One of the many outstanding features of Clip Studio Paint is its ability to incorporate 3D models to either draw over or use as fully rendered elements in your work.
Today, alongside new version 1.8 of Paint, Celsys has released the first-ever English language version of the free utility called Clip Studio Modeler.
It’s always been possible to drag 3D objects created in other applications into your Clip Studio projects, but Modeler goes one step further: allowing you to convert meshes into the proprietary format required for them to reside as reusable 3D materials in your library. And imported boned objects can be remapped so that they can be posed with the over-1500 pre-made poses available in Clip’s online asset store.
If you’re new to 3D, I published a primer several years ago that should still be relevant to absolute beginners. You can find it here: https://www.surfaceproartist.com/blog/2013/8/18/ot-3d-basics-for-manga-studio
For everyone else, here’s a quick run-down of how to get a boned 3D character in to Clip Studio Paint.
First, you’ll want to export your mesh in FBX 2014 format from your favorite modeling and animation software. Modeler will allow you to import a couple of other formats, but FBX is the standard for poseable textured objects.
I tested this workflow with free models from DAZ3D Studio and Adobe’s Mixamo.com.
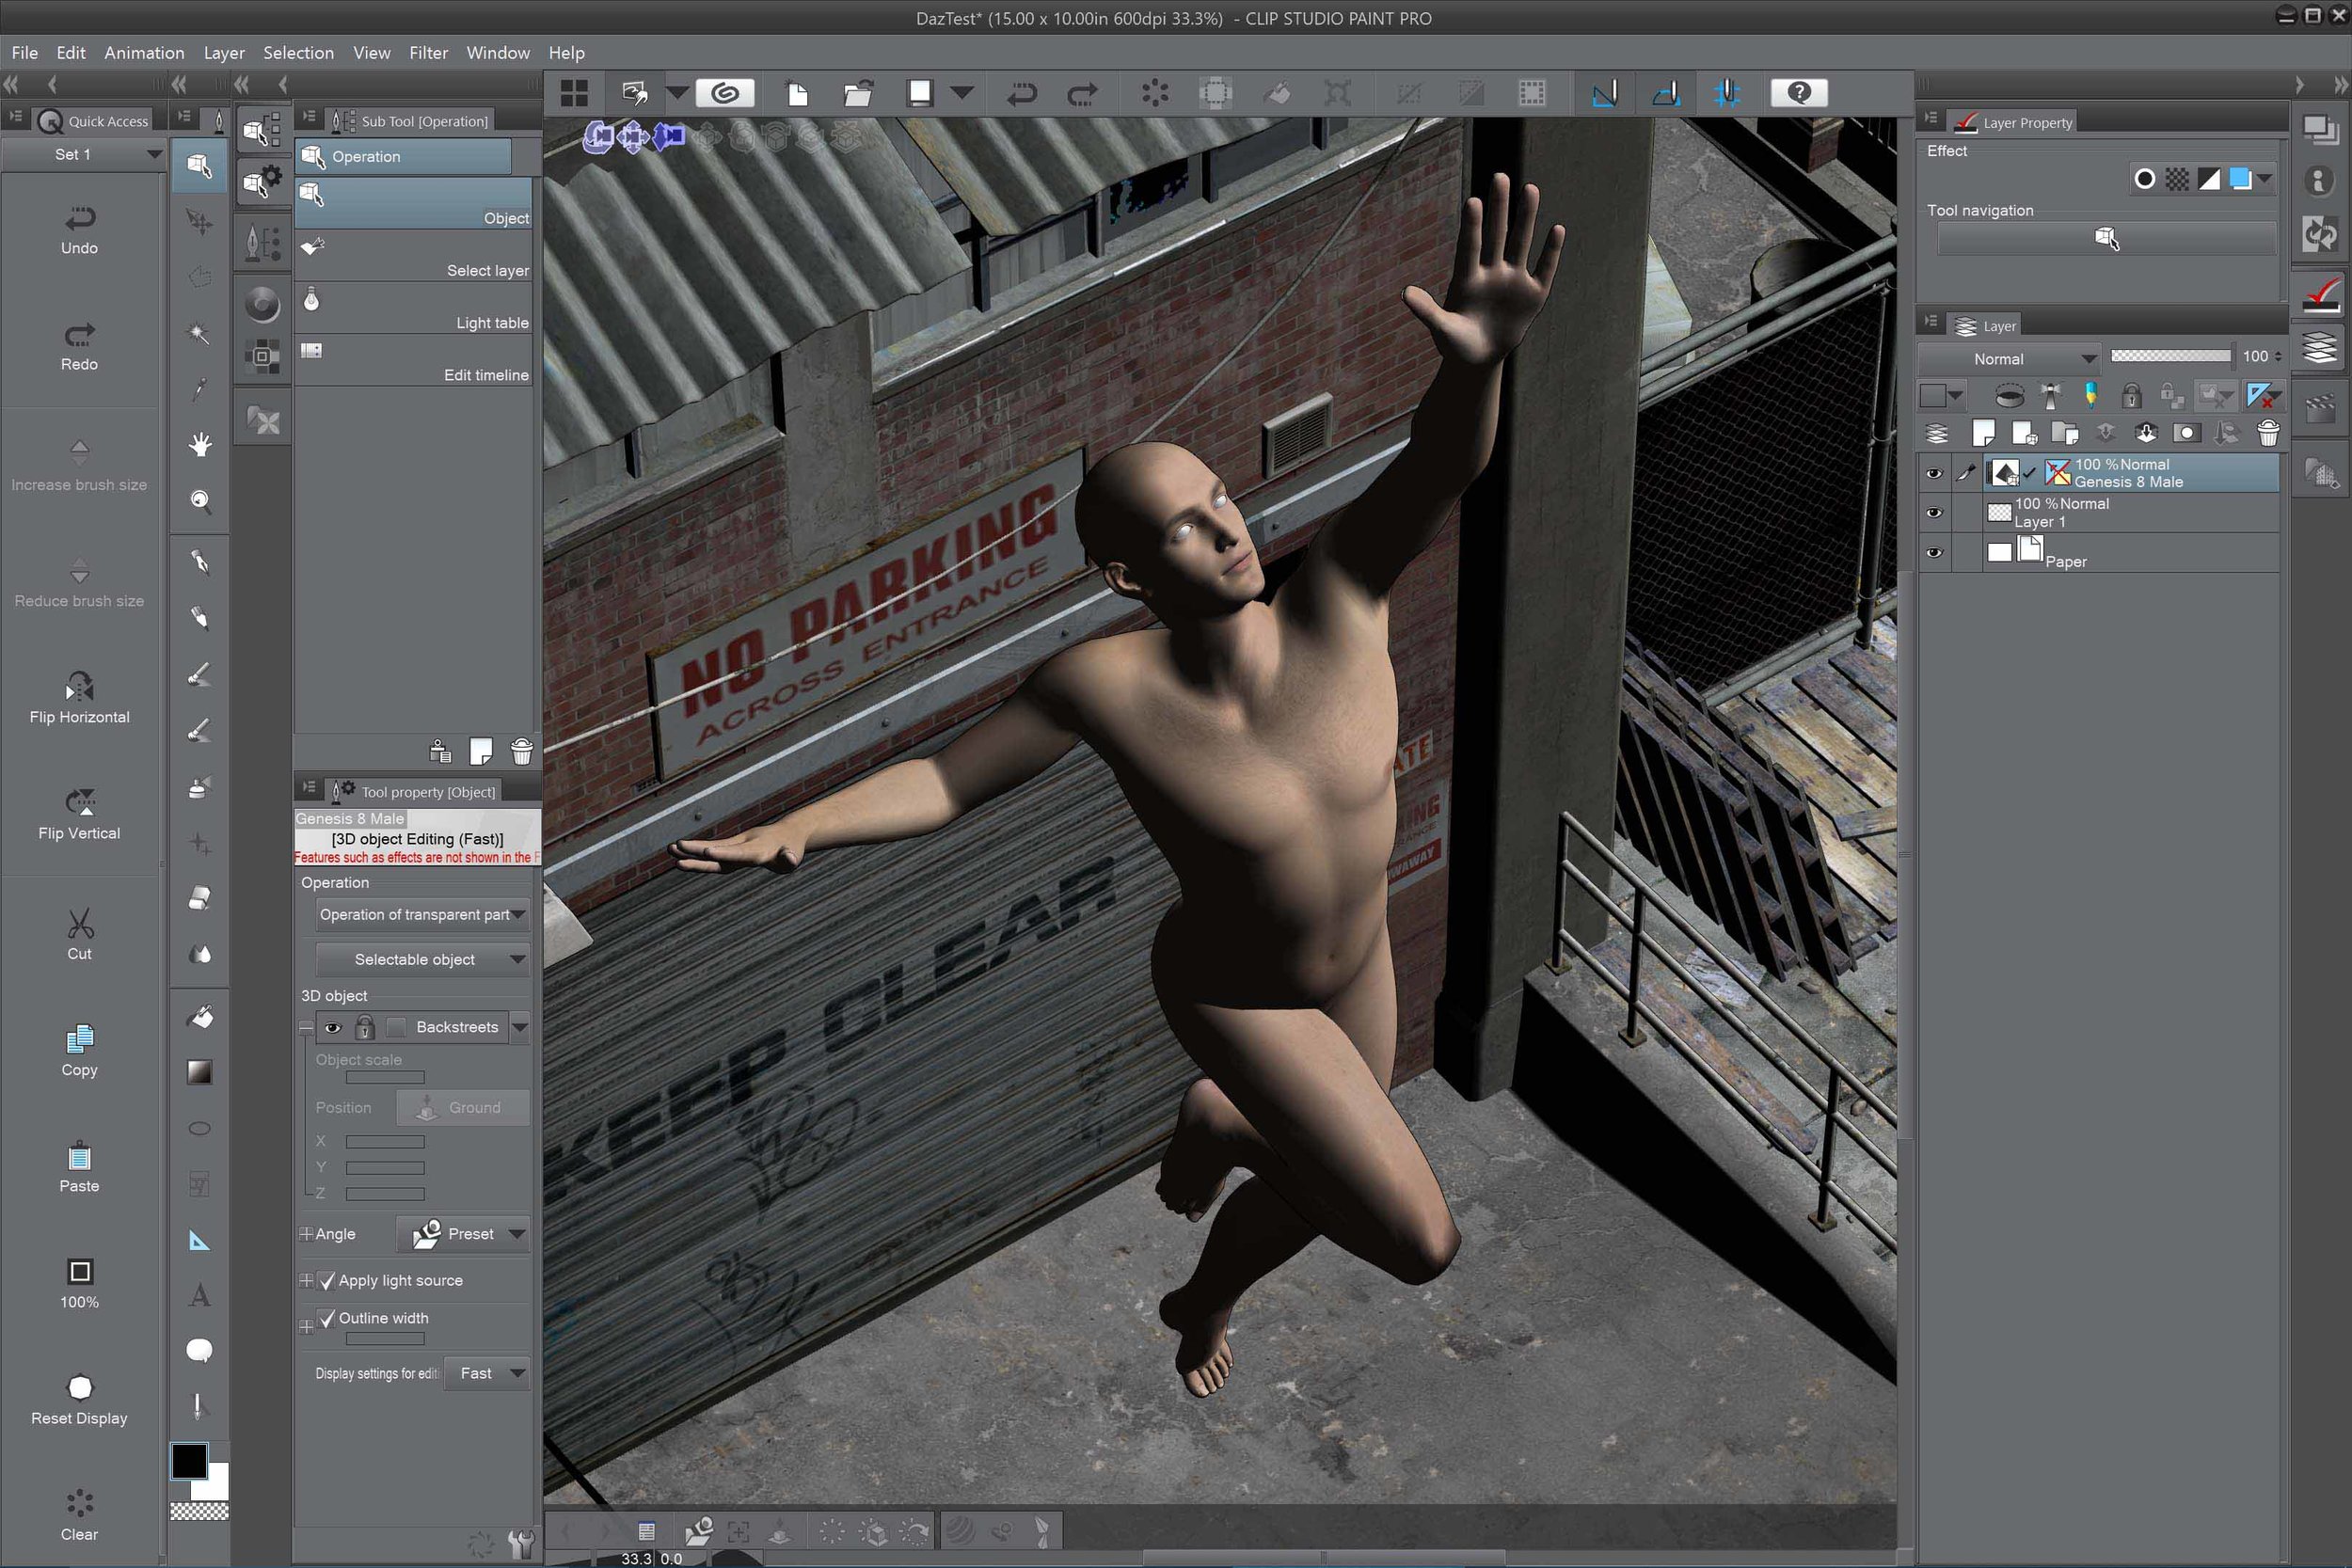
DAZ and Poser objects can be very complex, with dozens of textures and more bones than are required. In the example above, I wasn’t able to properly export clothed figures. Eye maps were missing and transparency of eyelash maps didn’t render correctly. However, static objects such as backgrounds or props exported beautifully.
Results were much more consistent with Mixamo characters. Mixamo.com is a free service for Adobe Creative Cloud users. Although the site offers both textured characters and full animations for download, I was unable to extract poses from the animated files.
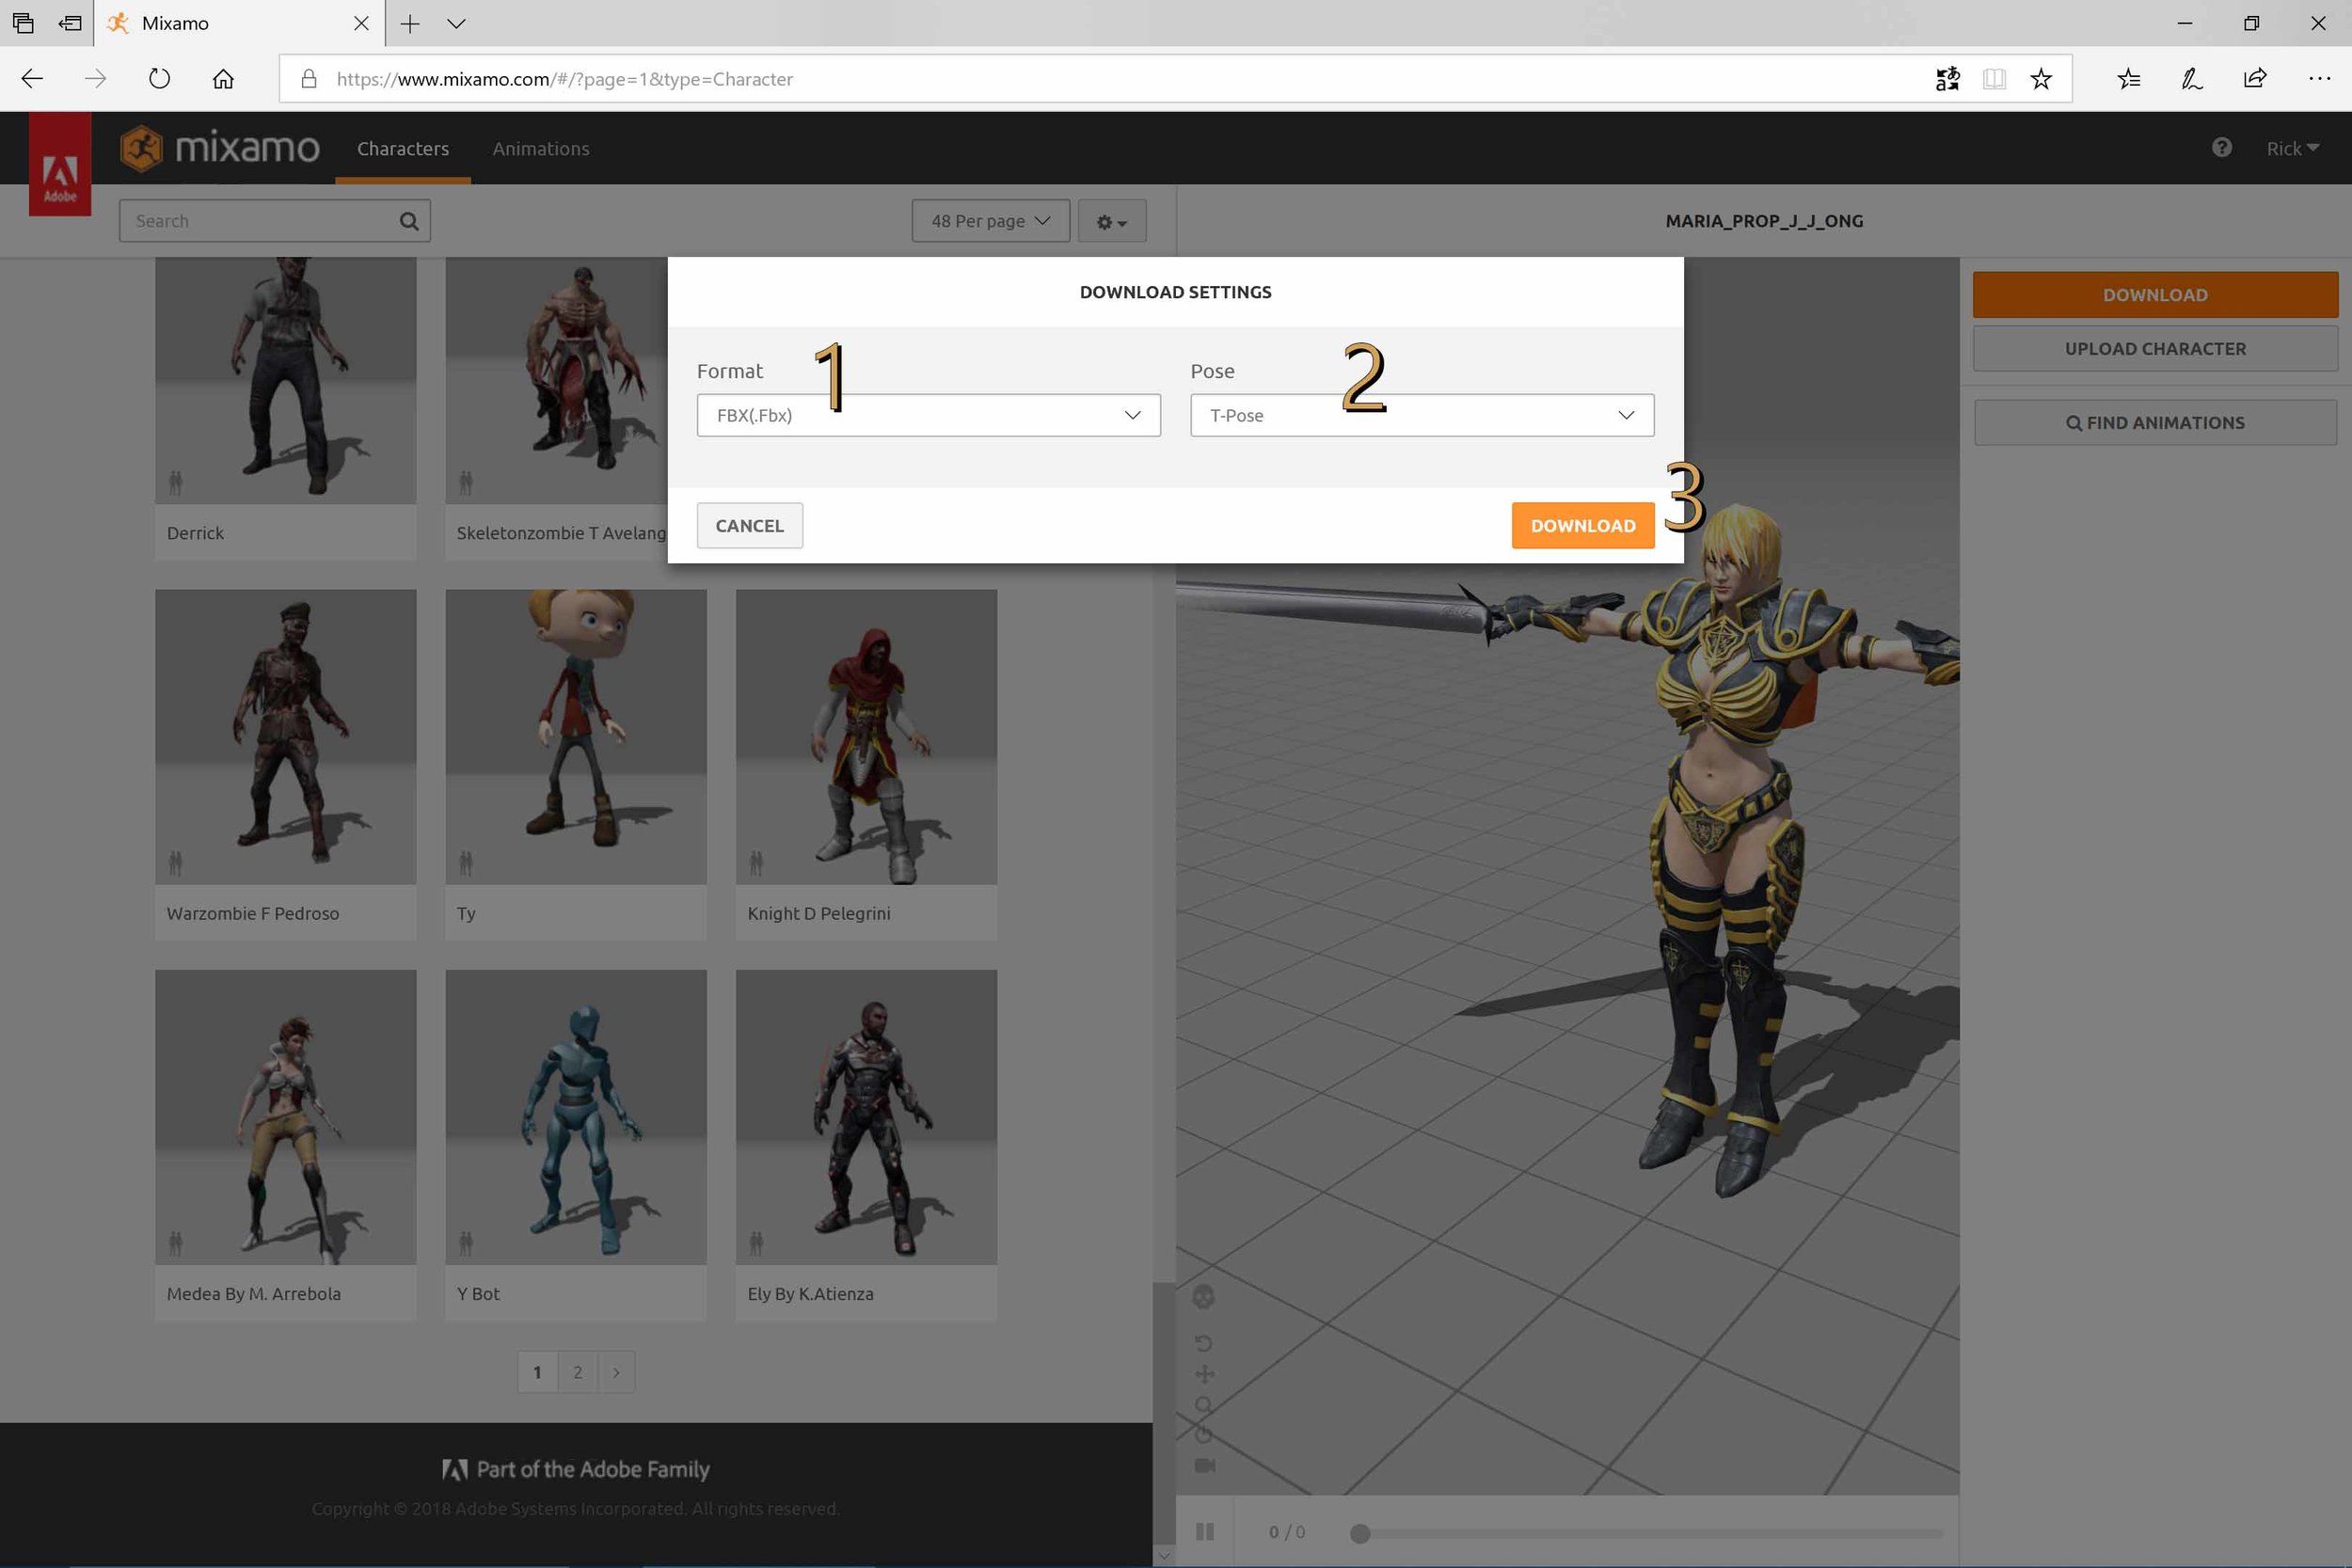
For my test, I chose to download (3) the Maria W/Prop character created by JJ Ong in FBX format (1) and in a T-Pose (2).
Clip Studio Modeler is available as a separate download here: http://www.clipstudio.net/en/modeler
The software can be intimidating upon first use but despite being around for several years for Japanese users, it actually doesn’t offer very many features. Once you know the basic steps, it only takes a couple of minutes to import, set up and export an object.

Once installed, Modeler is available on the Clip Studio start screen (4).

When you first load Modeler, you are asked if you want to create a 3d object (5) or 3d character (6).
One of the oddest design choices of the software is that there is no obvious “import” menu item. Clicking load only reveals Clip’s proprietary formats.
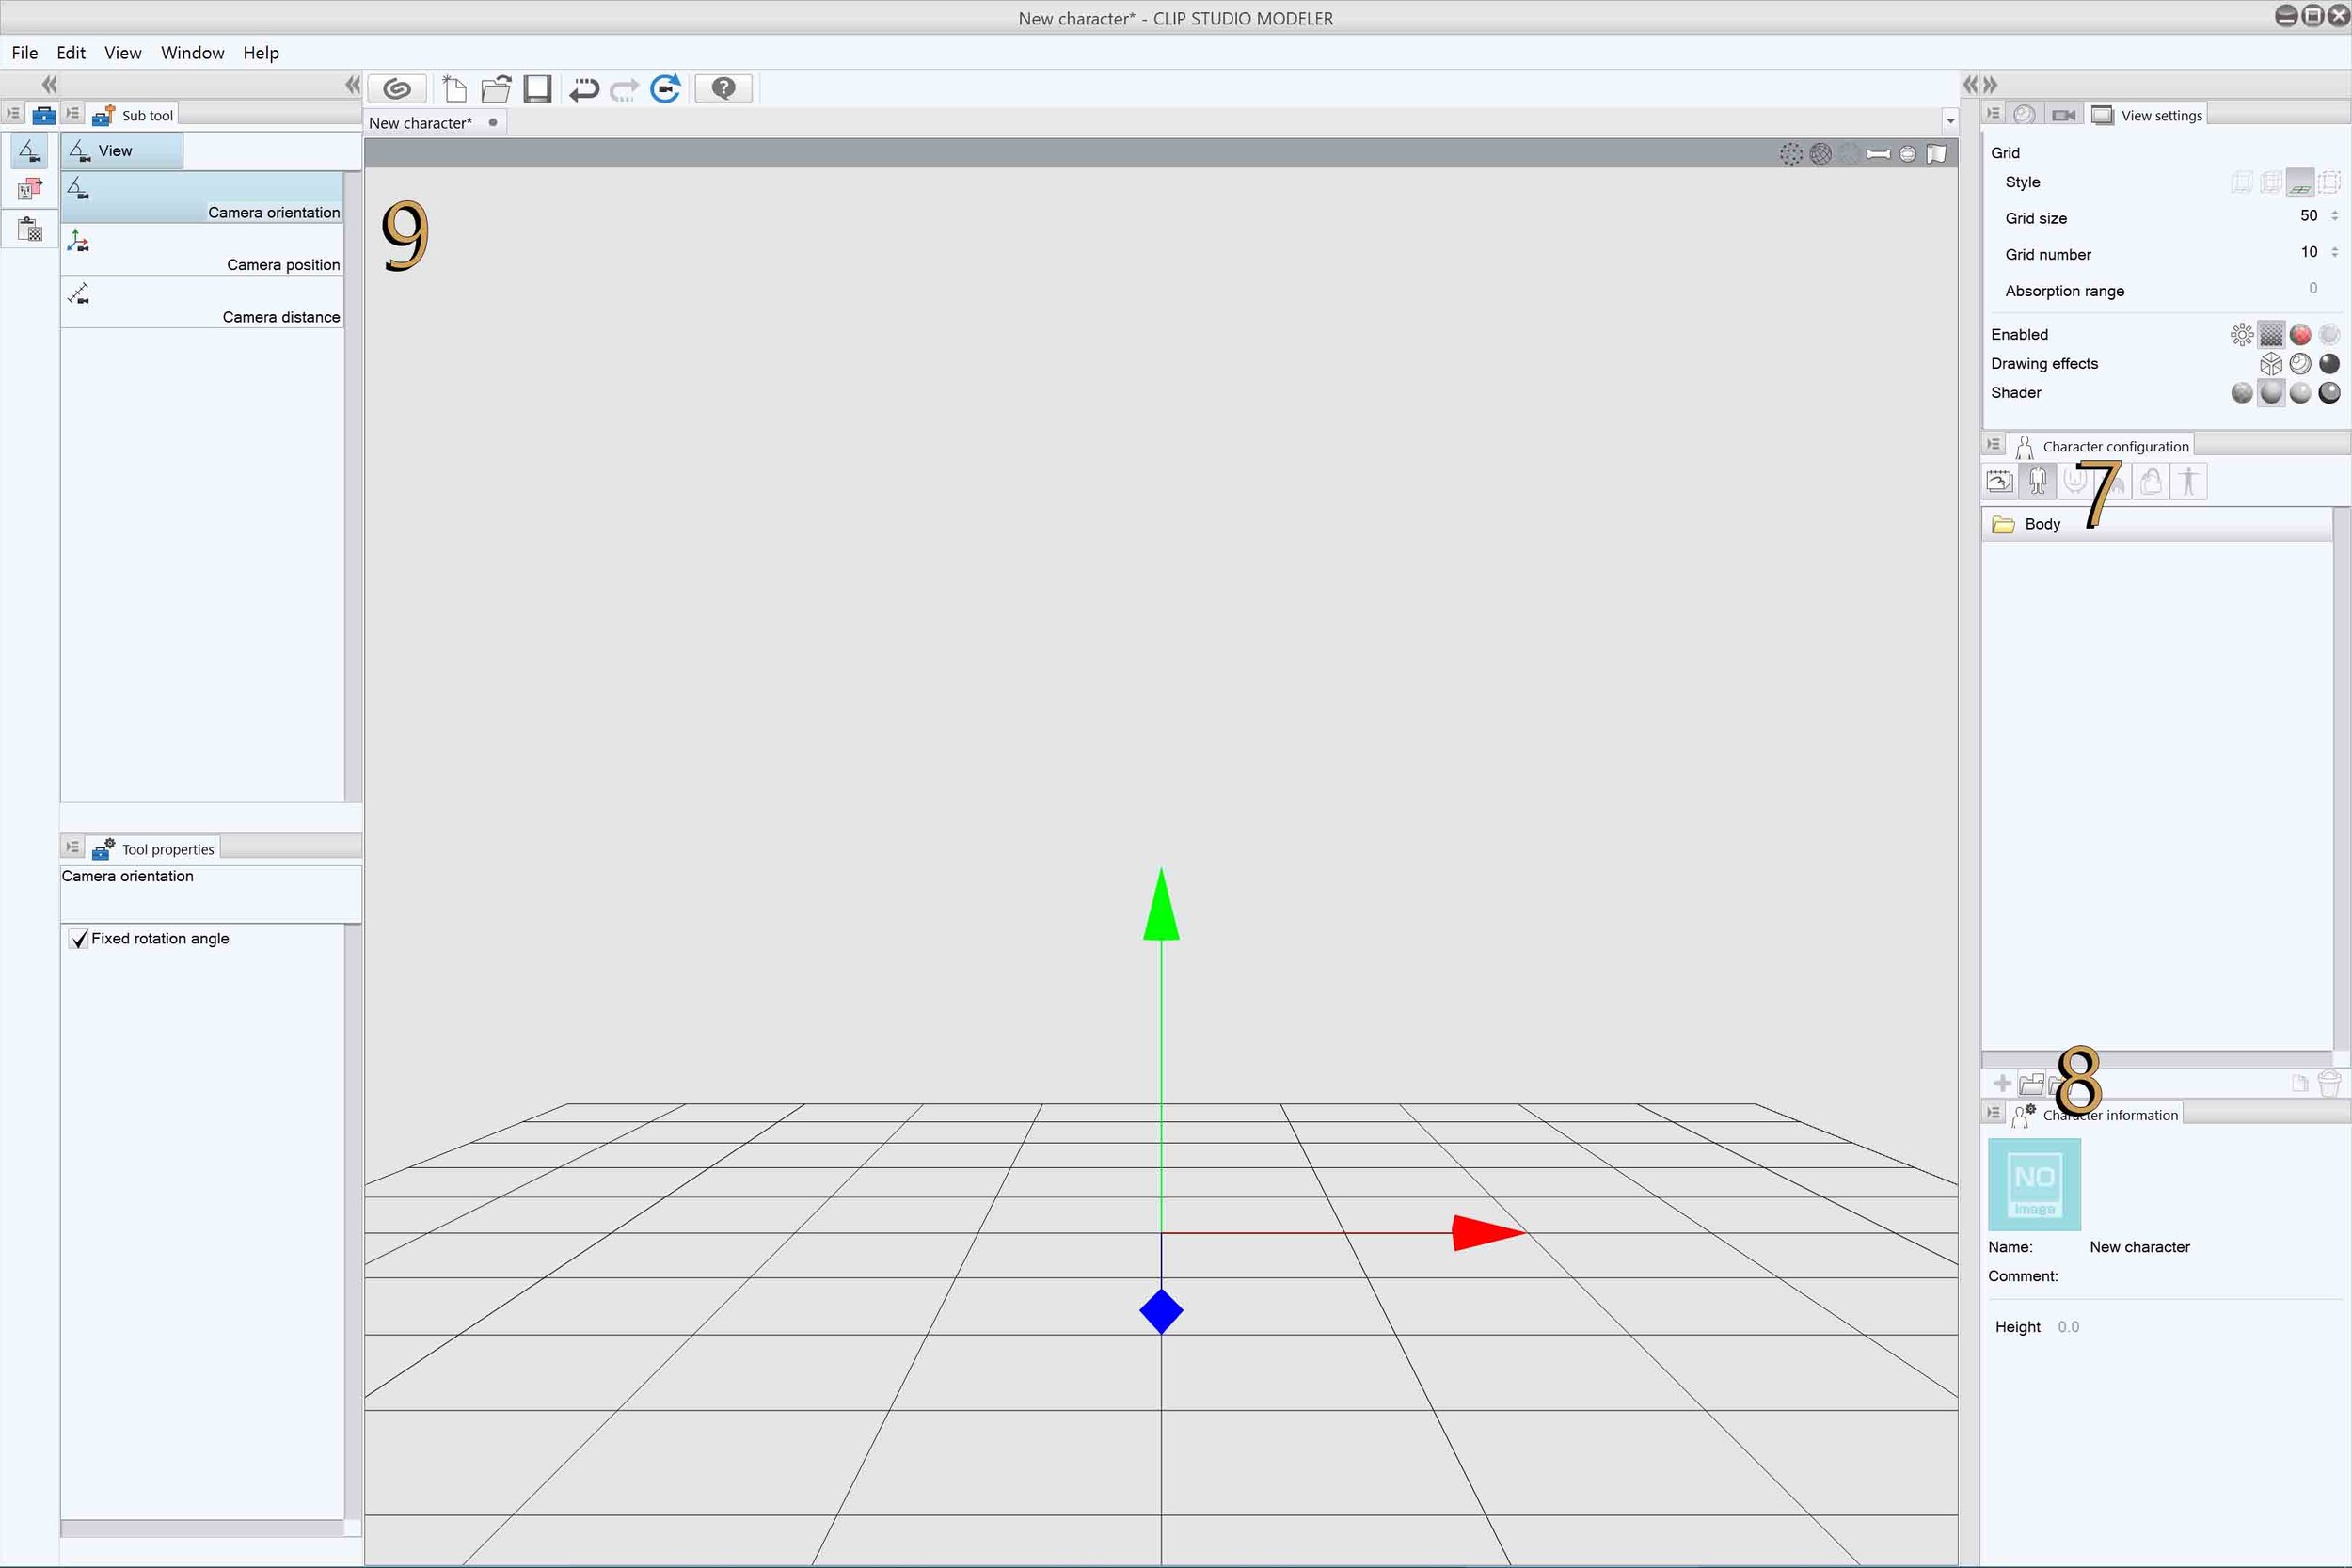
In order to import the FBX file, look over to the Character configuration panel on the right of the viewport. Select the Body tab (7) and then click Add from File at the bottom of that panel (8). (It’s a very awkward process and it also depends on having Move Parts or Move Sketch selected from the Sub Tool panel on the left of the viewport!) (9)

Find your FBX file and select Open (10).
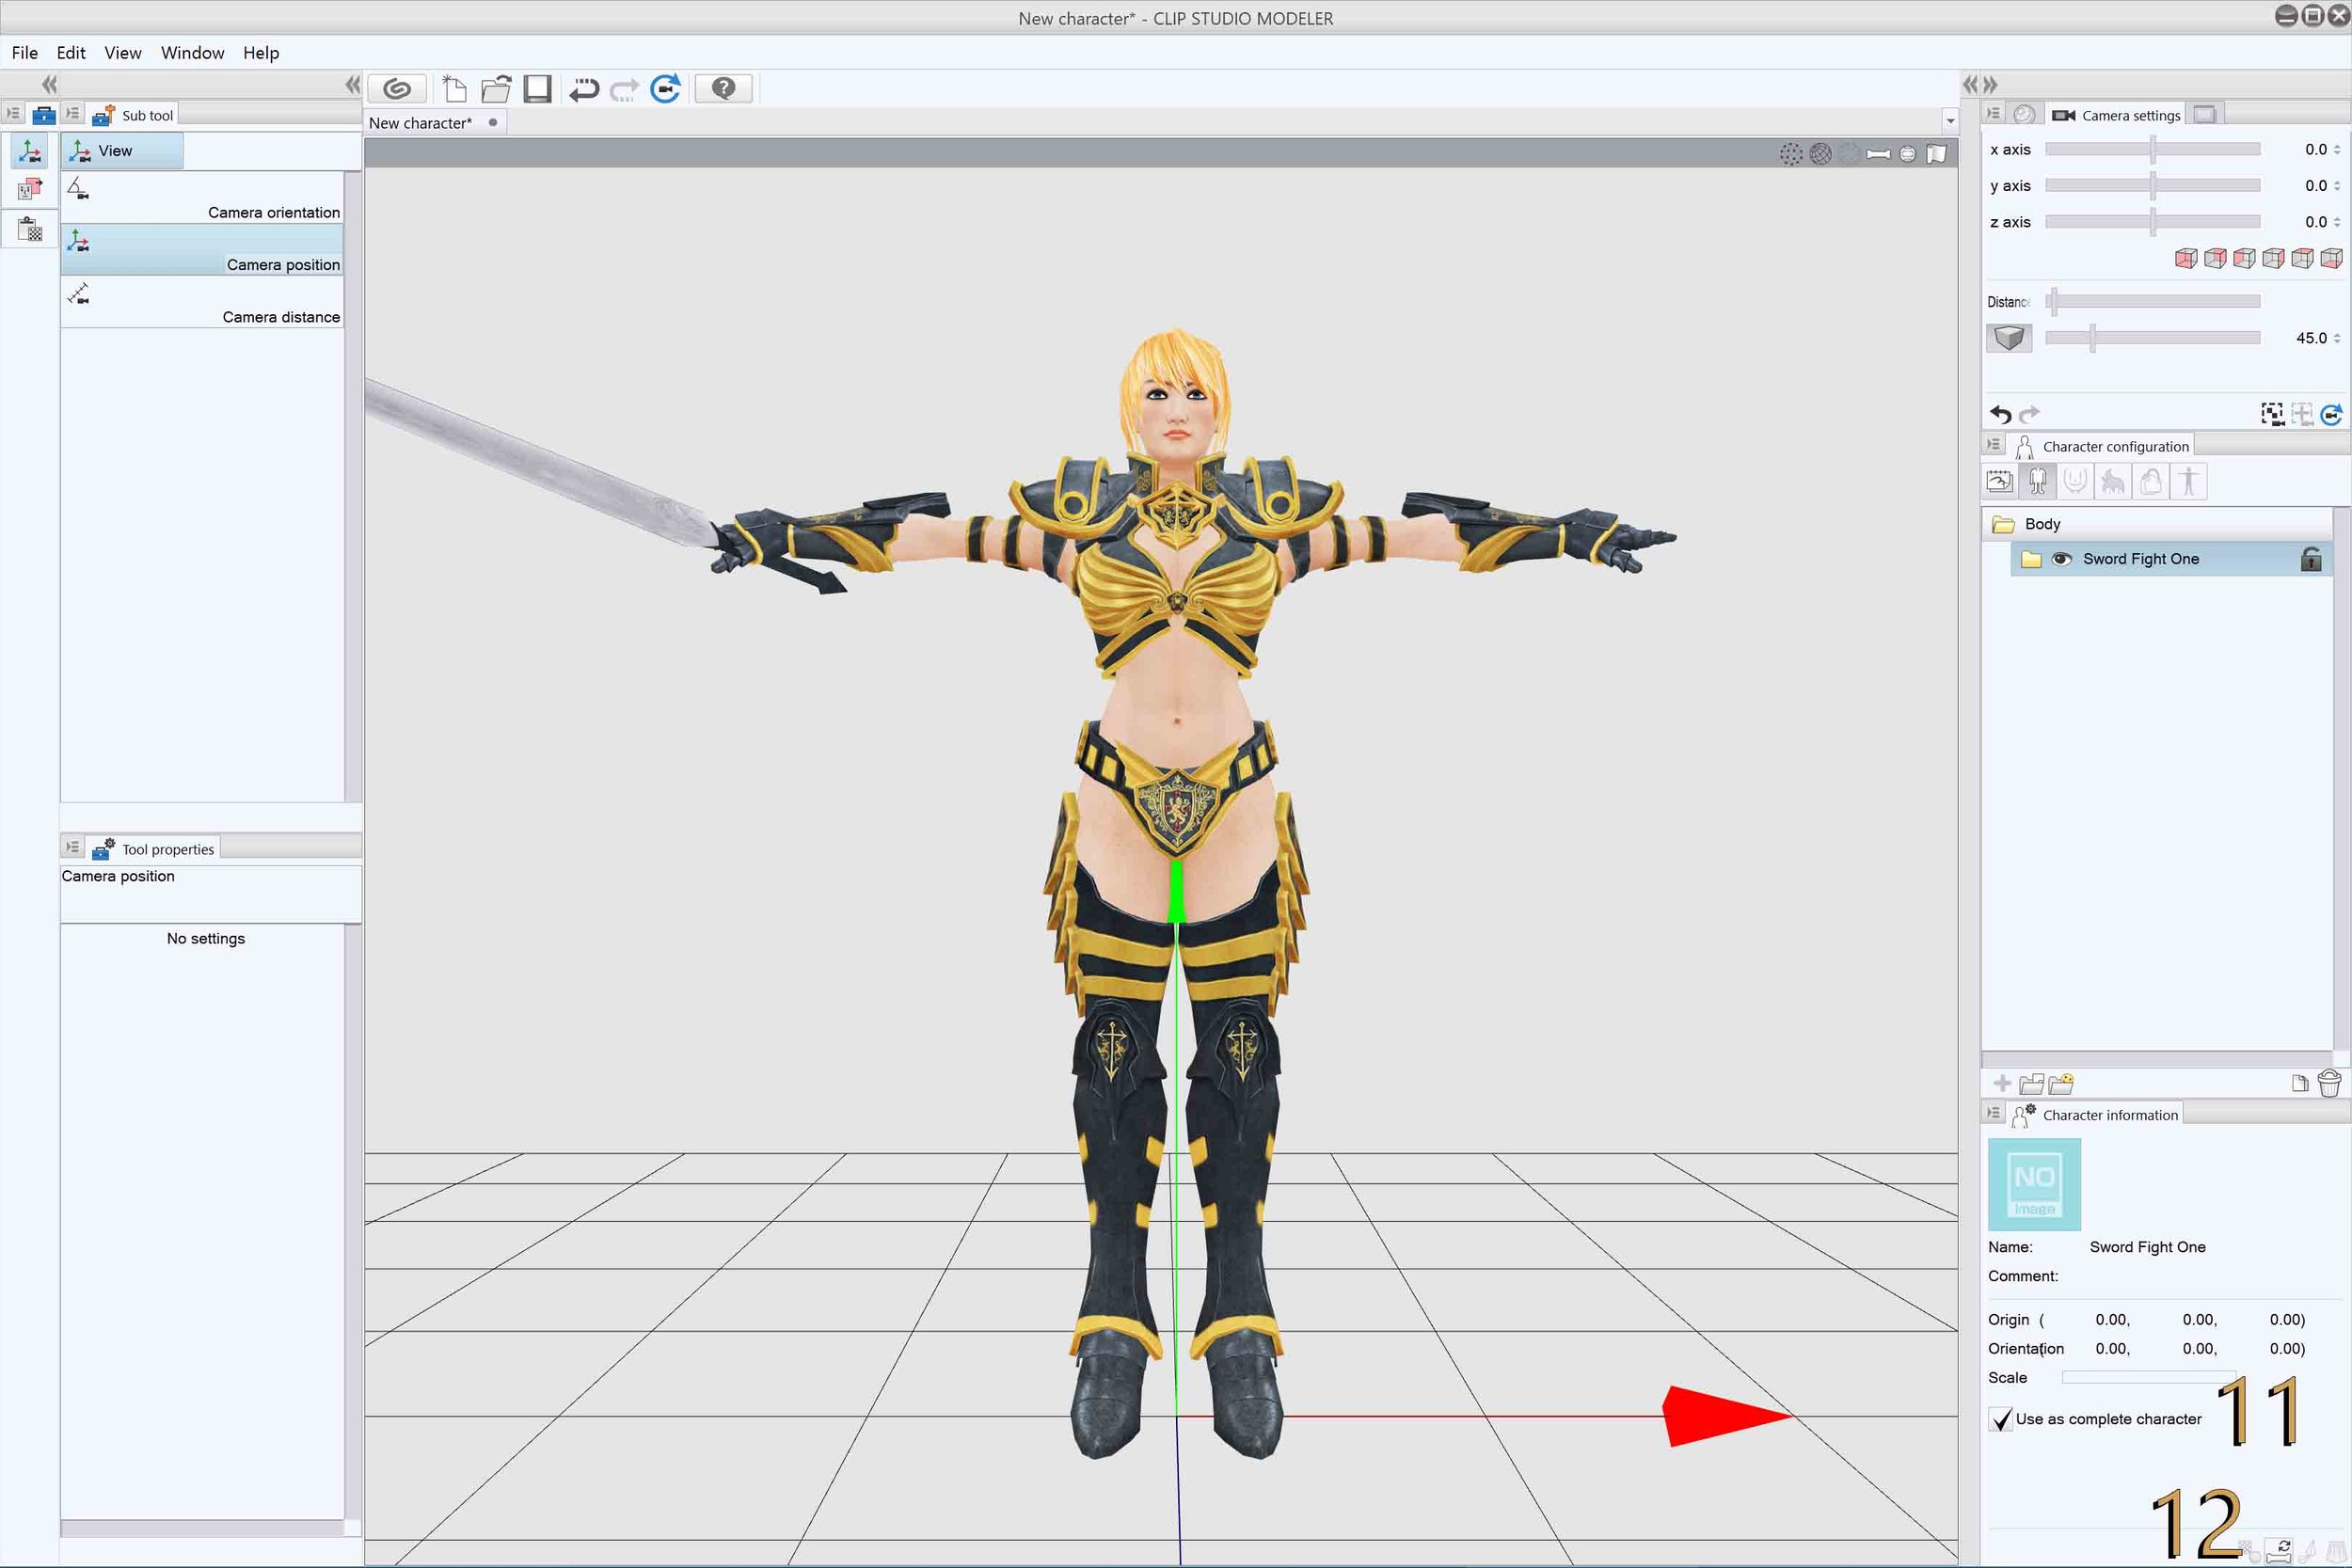
Once your character is loaded, select it and tick “Use as complete character” in the Character information panel (11). Then select the Bone icon at the very bottom of the panel to “Perform Standard Bone Mapping” (12).

A warning will pop up and click OK (13).
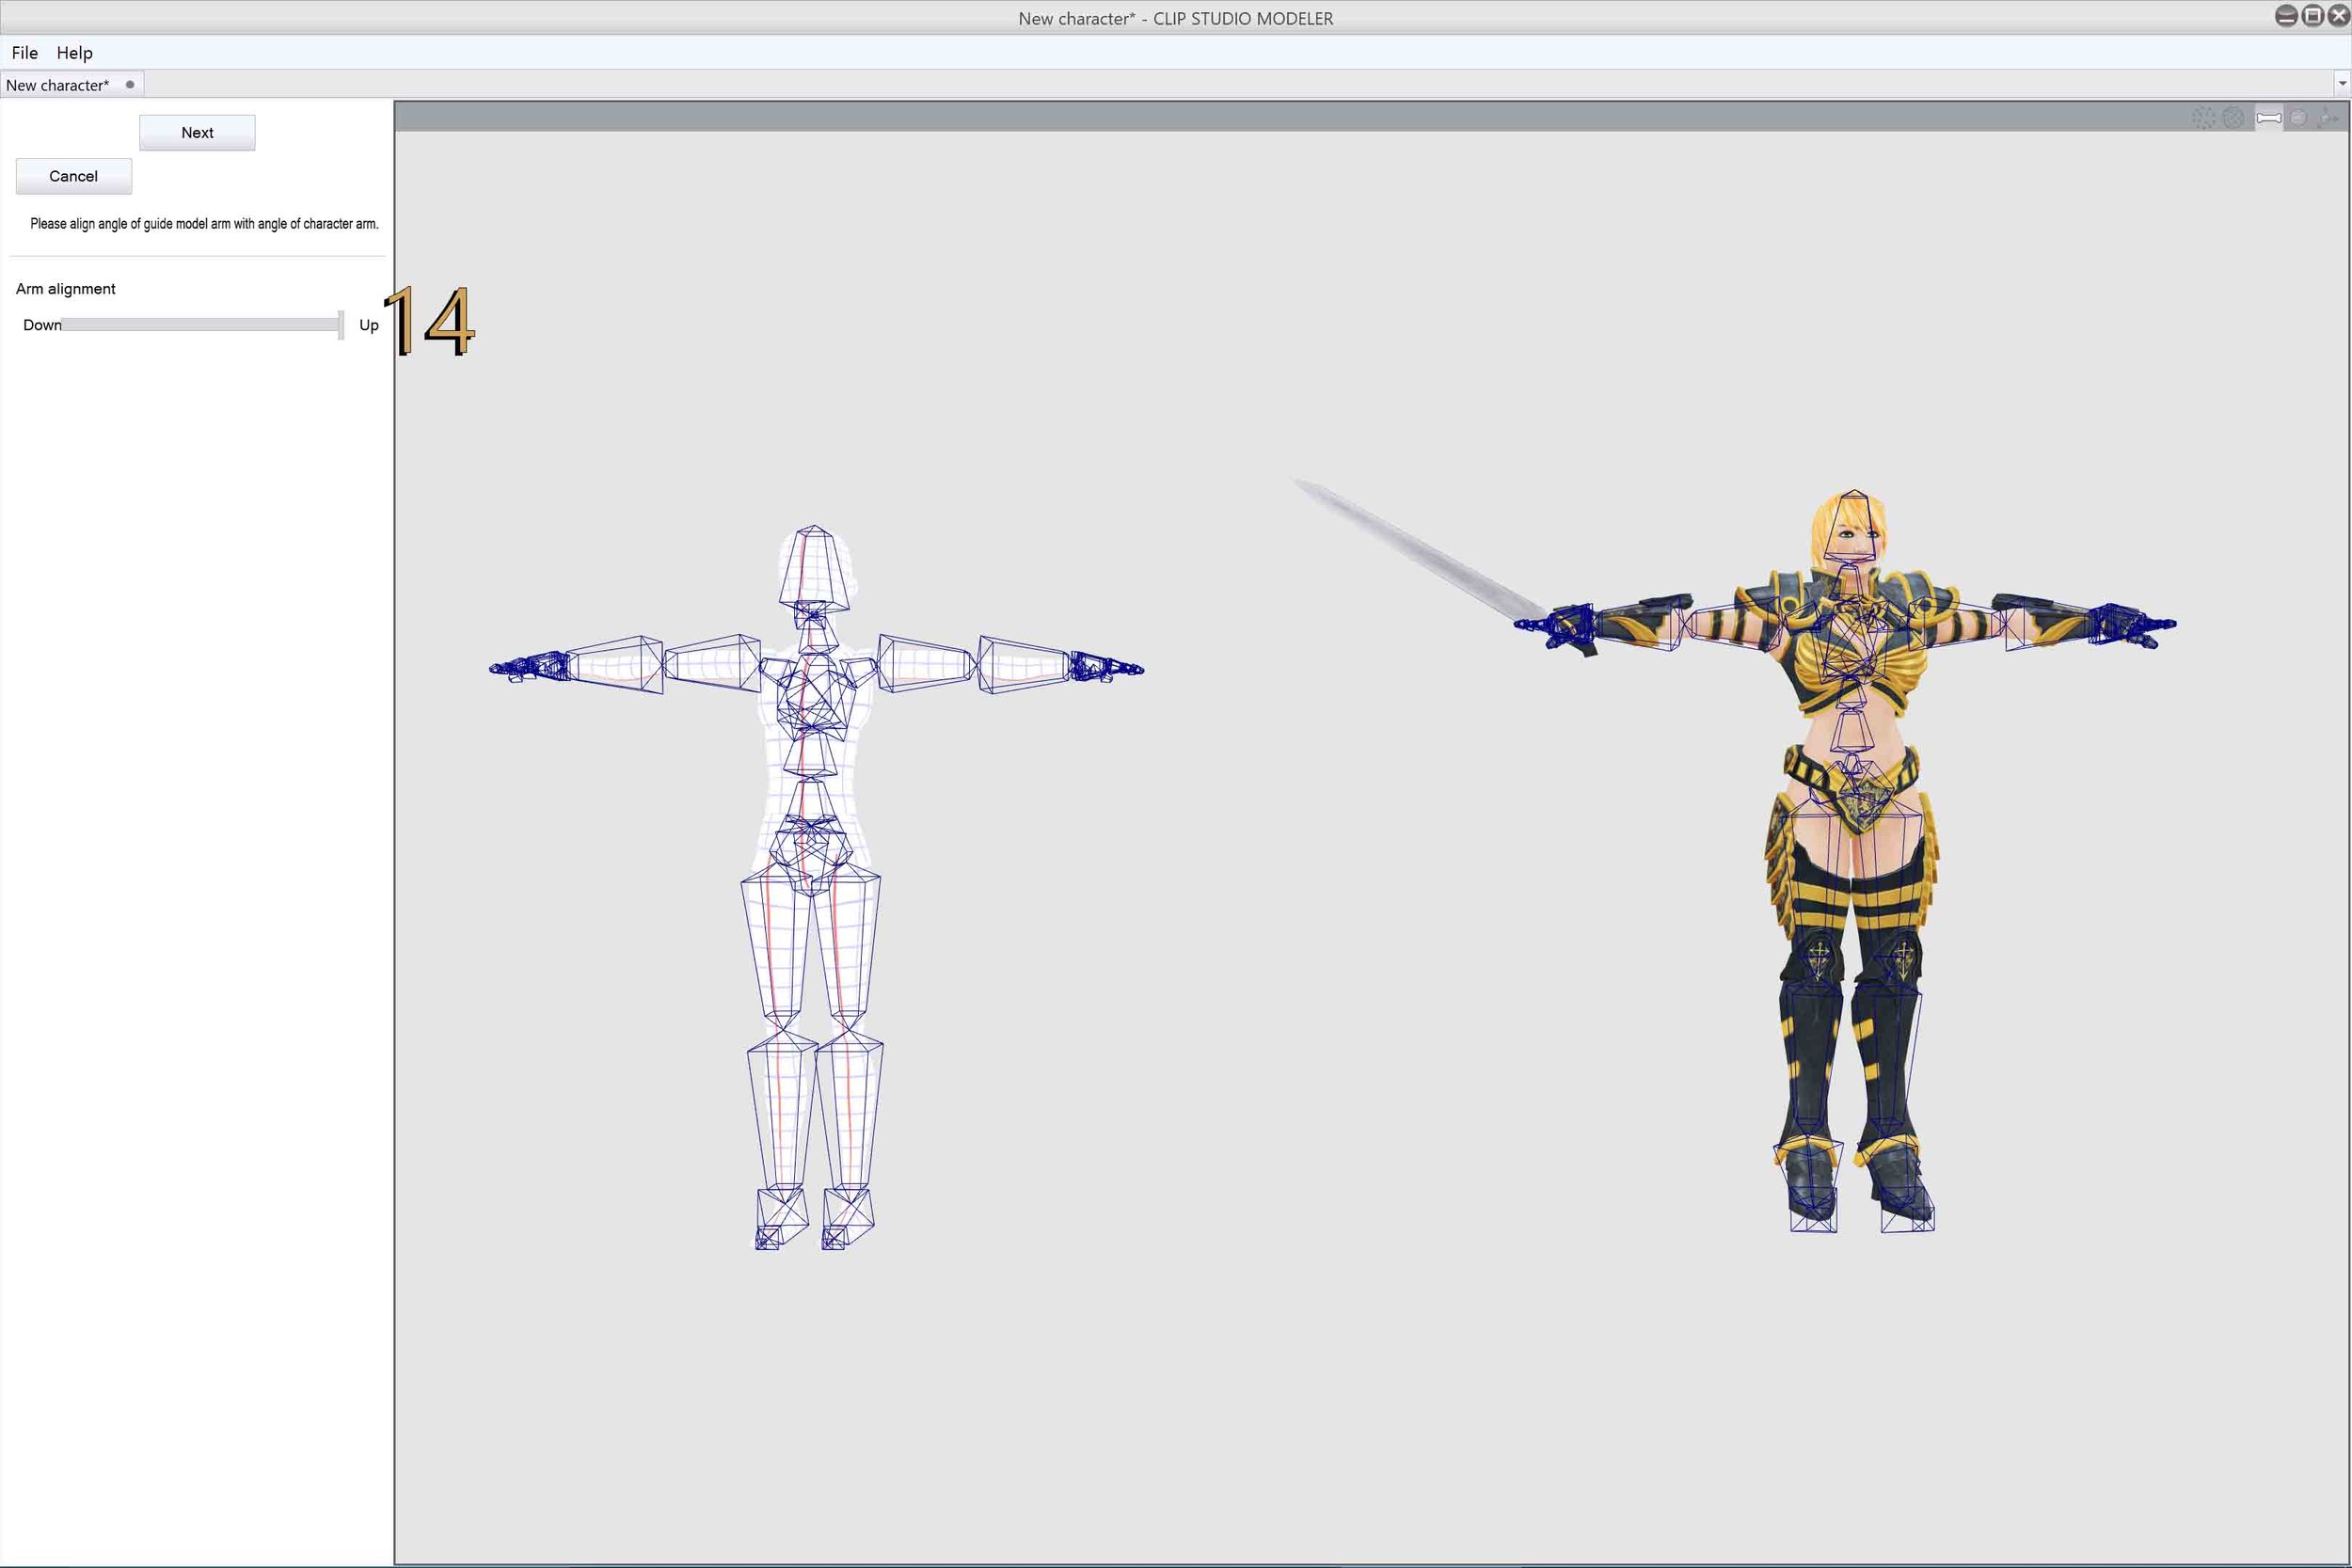
On the bone mapping screen, use the slider to adjust the guide model’s arm alignment to match your imported object (14).
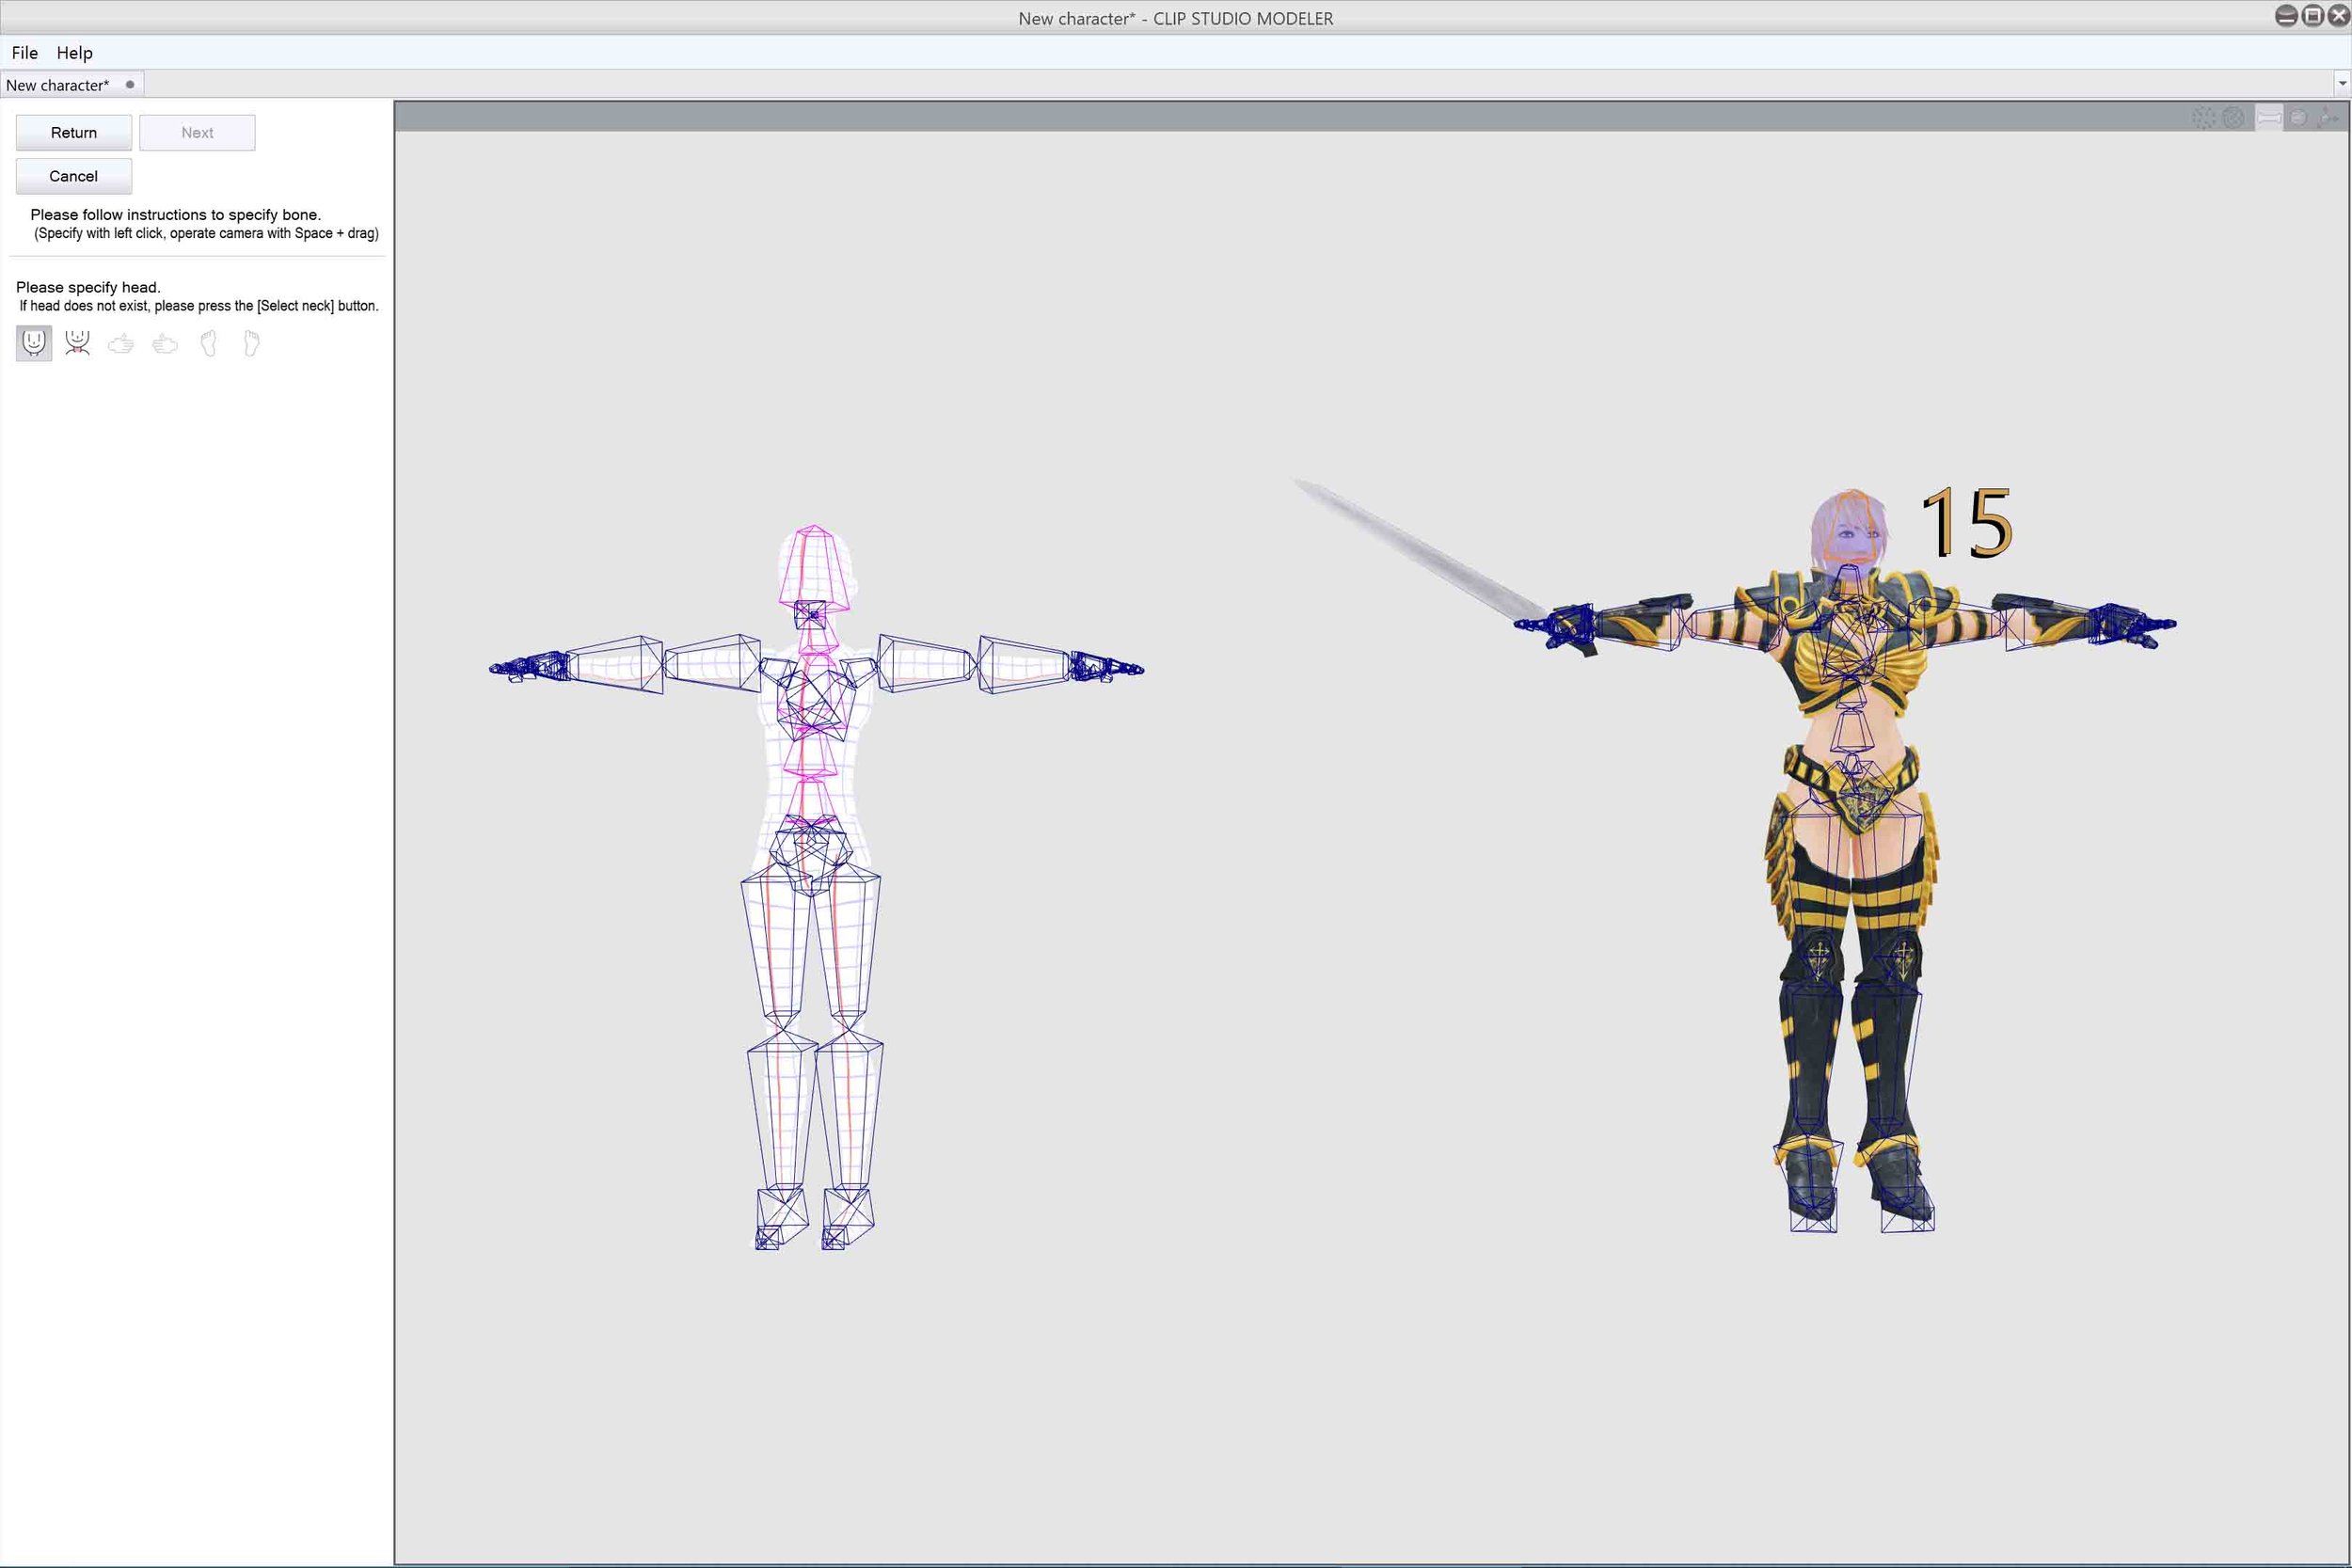
On the next screens, identify the head or neck bones on your object, followed by the right and left arm and the right and left leg joints (15).
If you have trouble picking the precise bone on your object, you can use space-drag to adjust the camera for a better view.
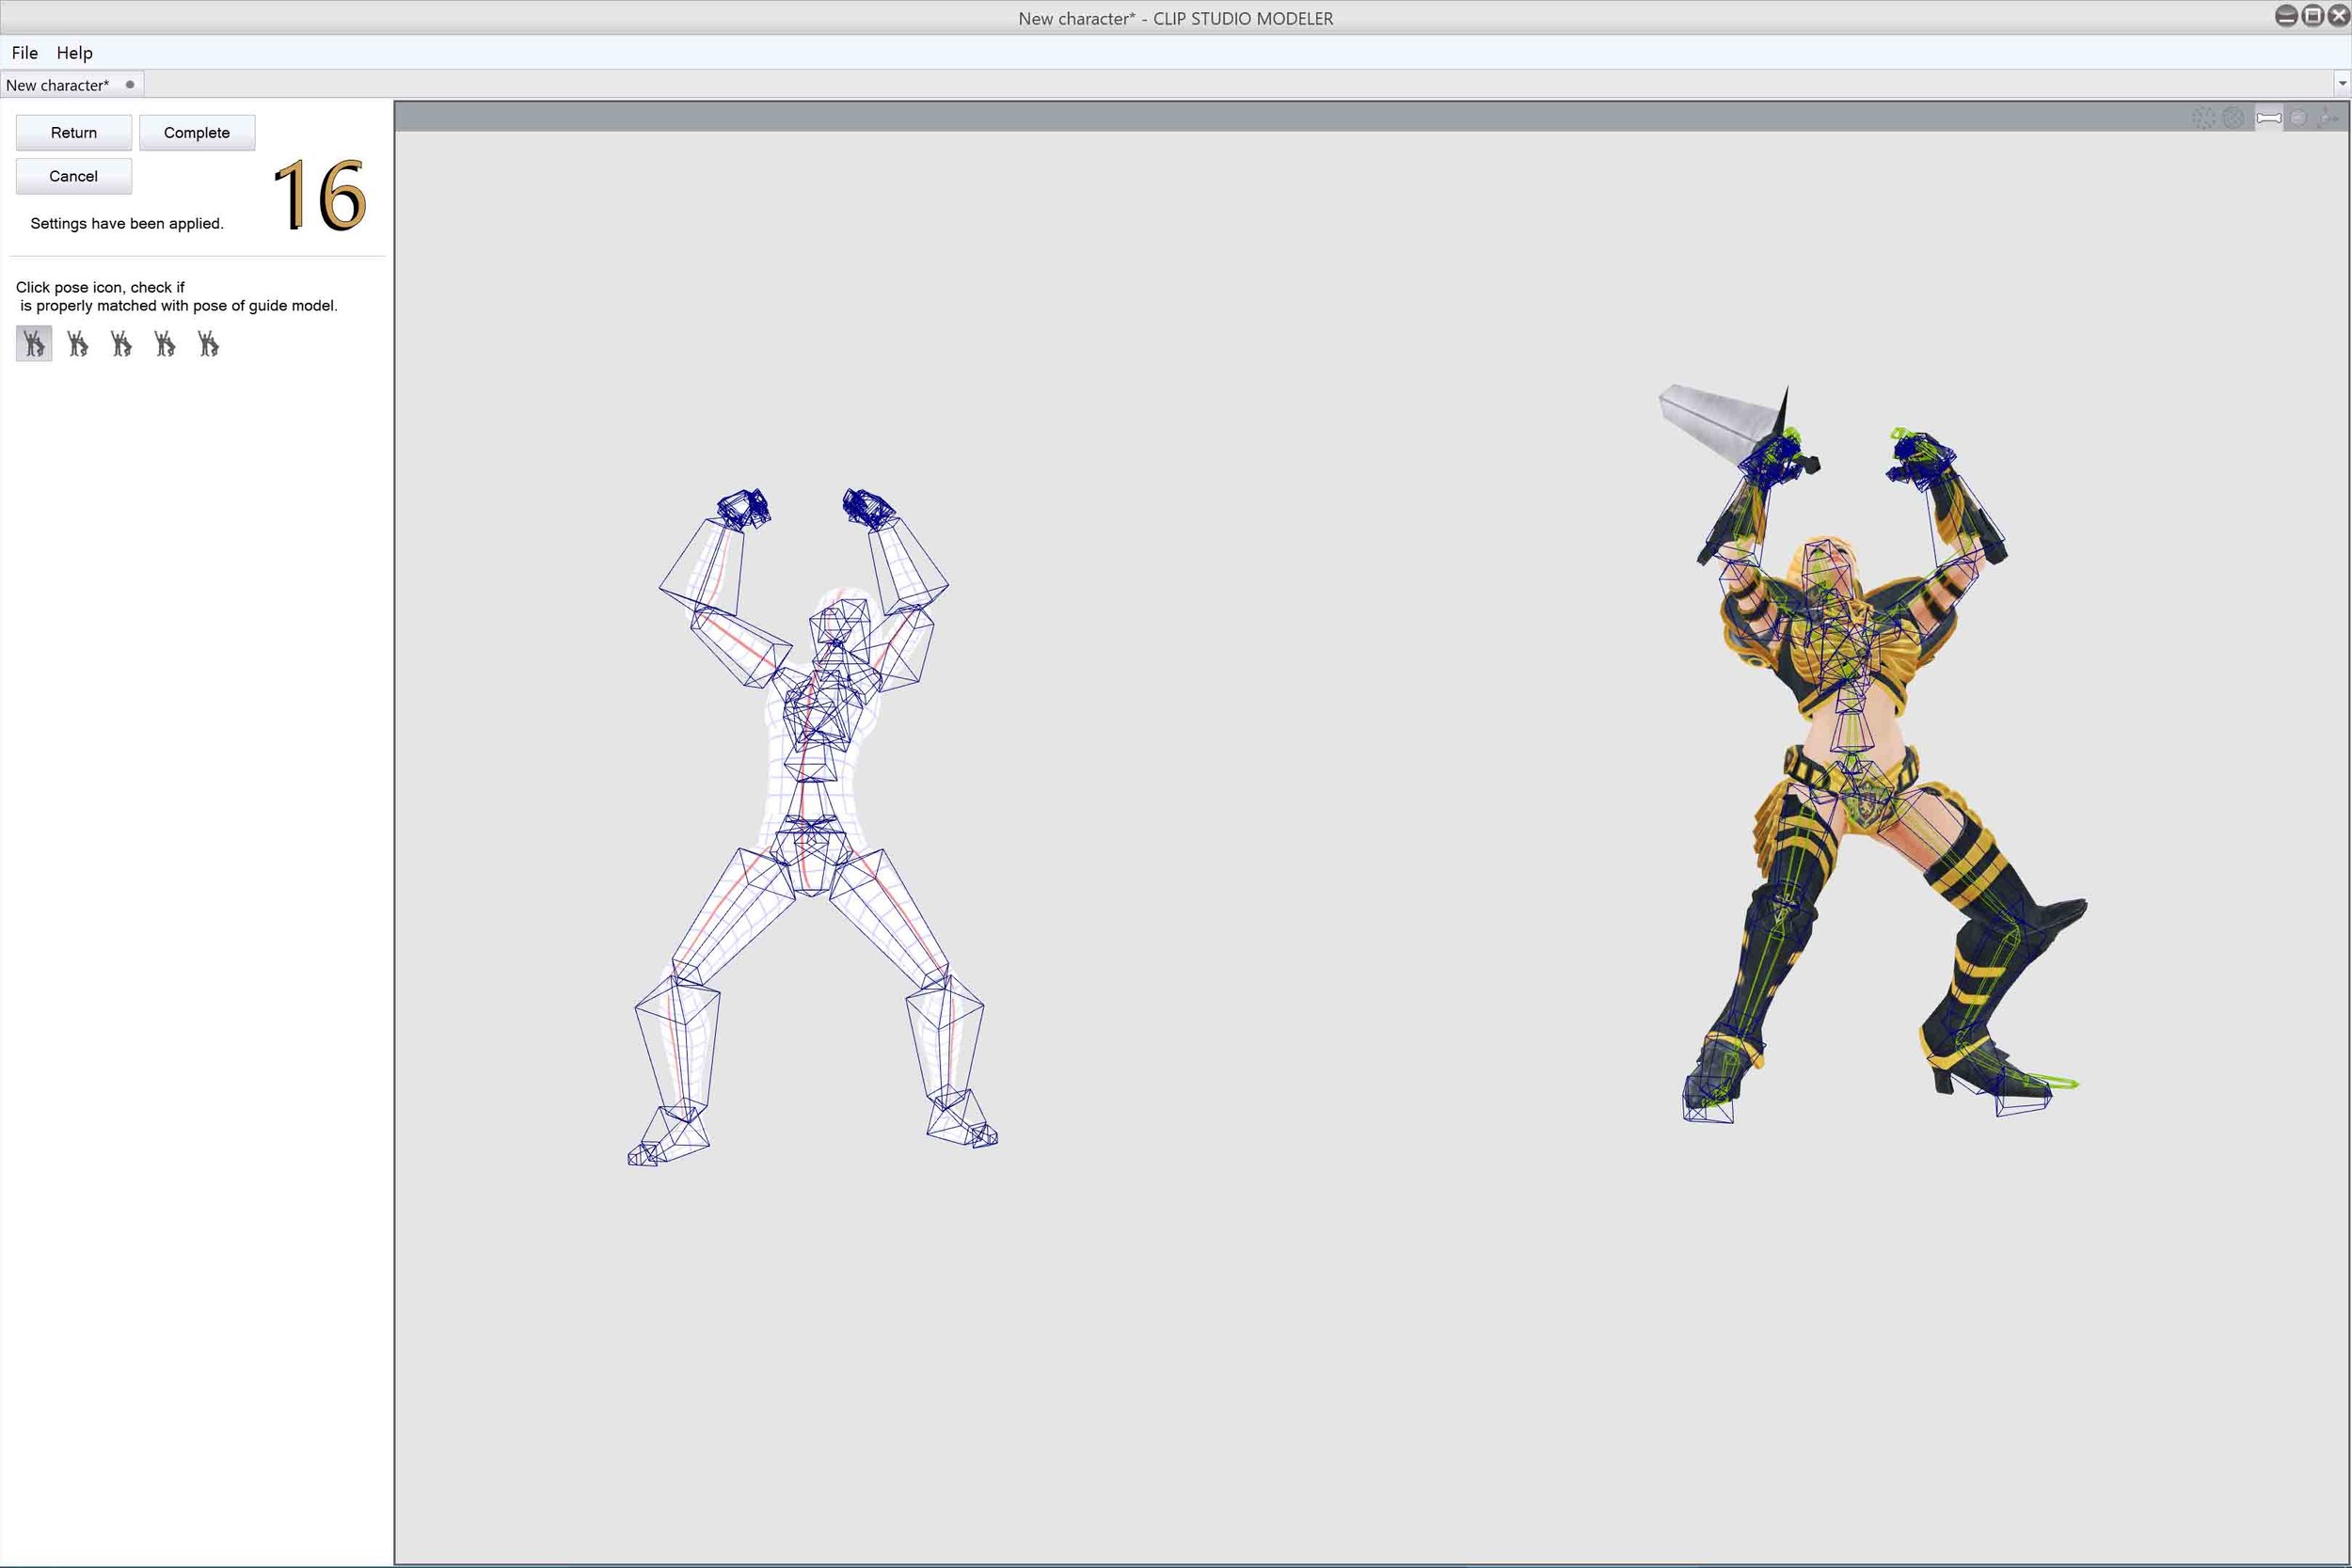
Test your work on the next set of screens with five stress poses and click Complete when you’re done (16).
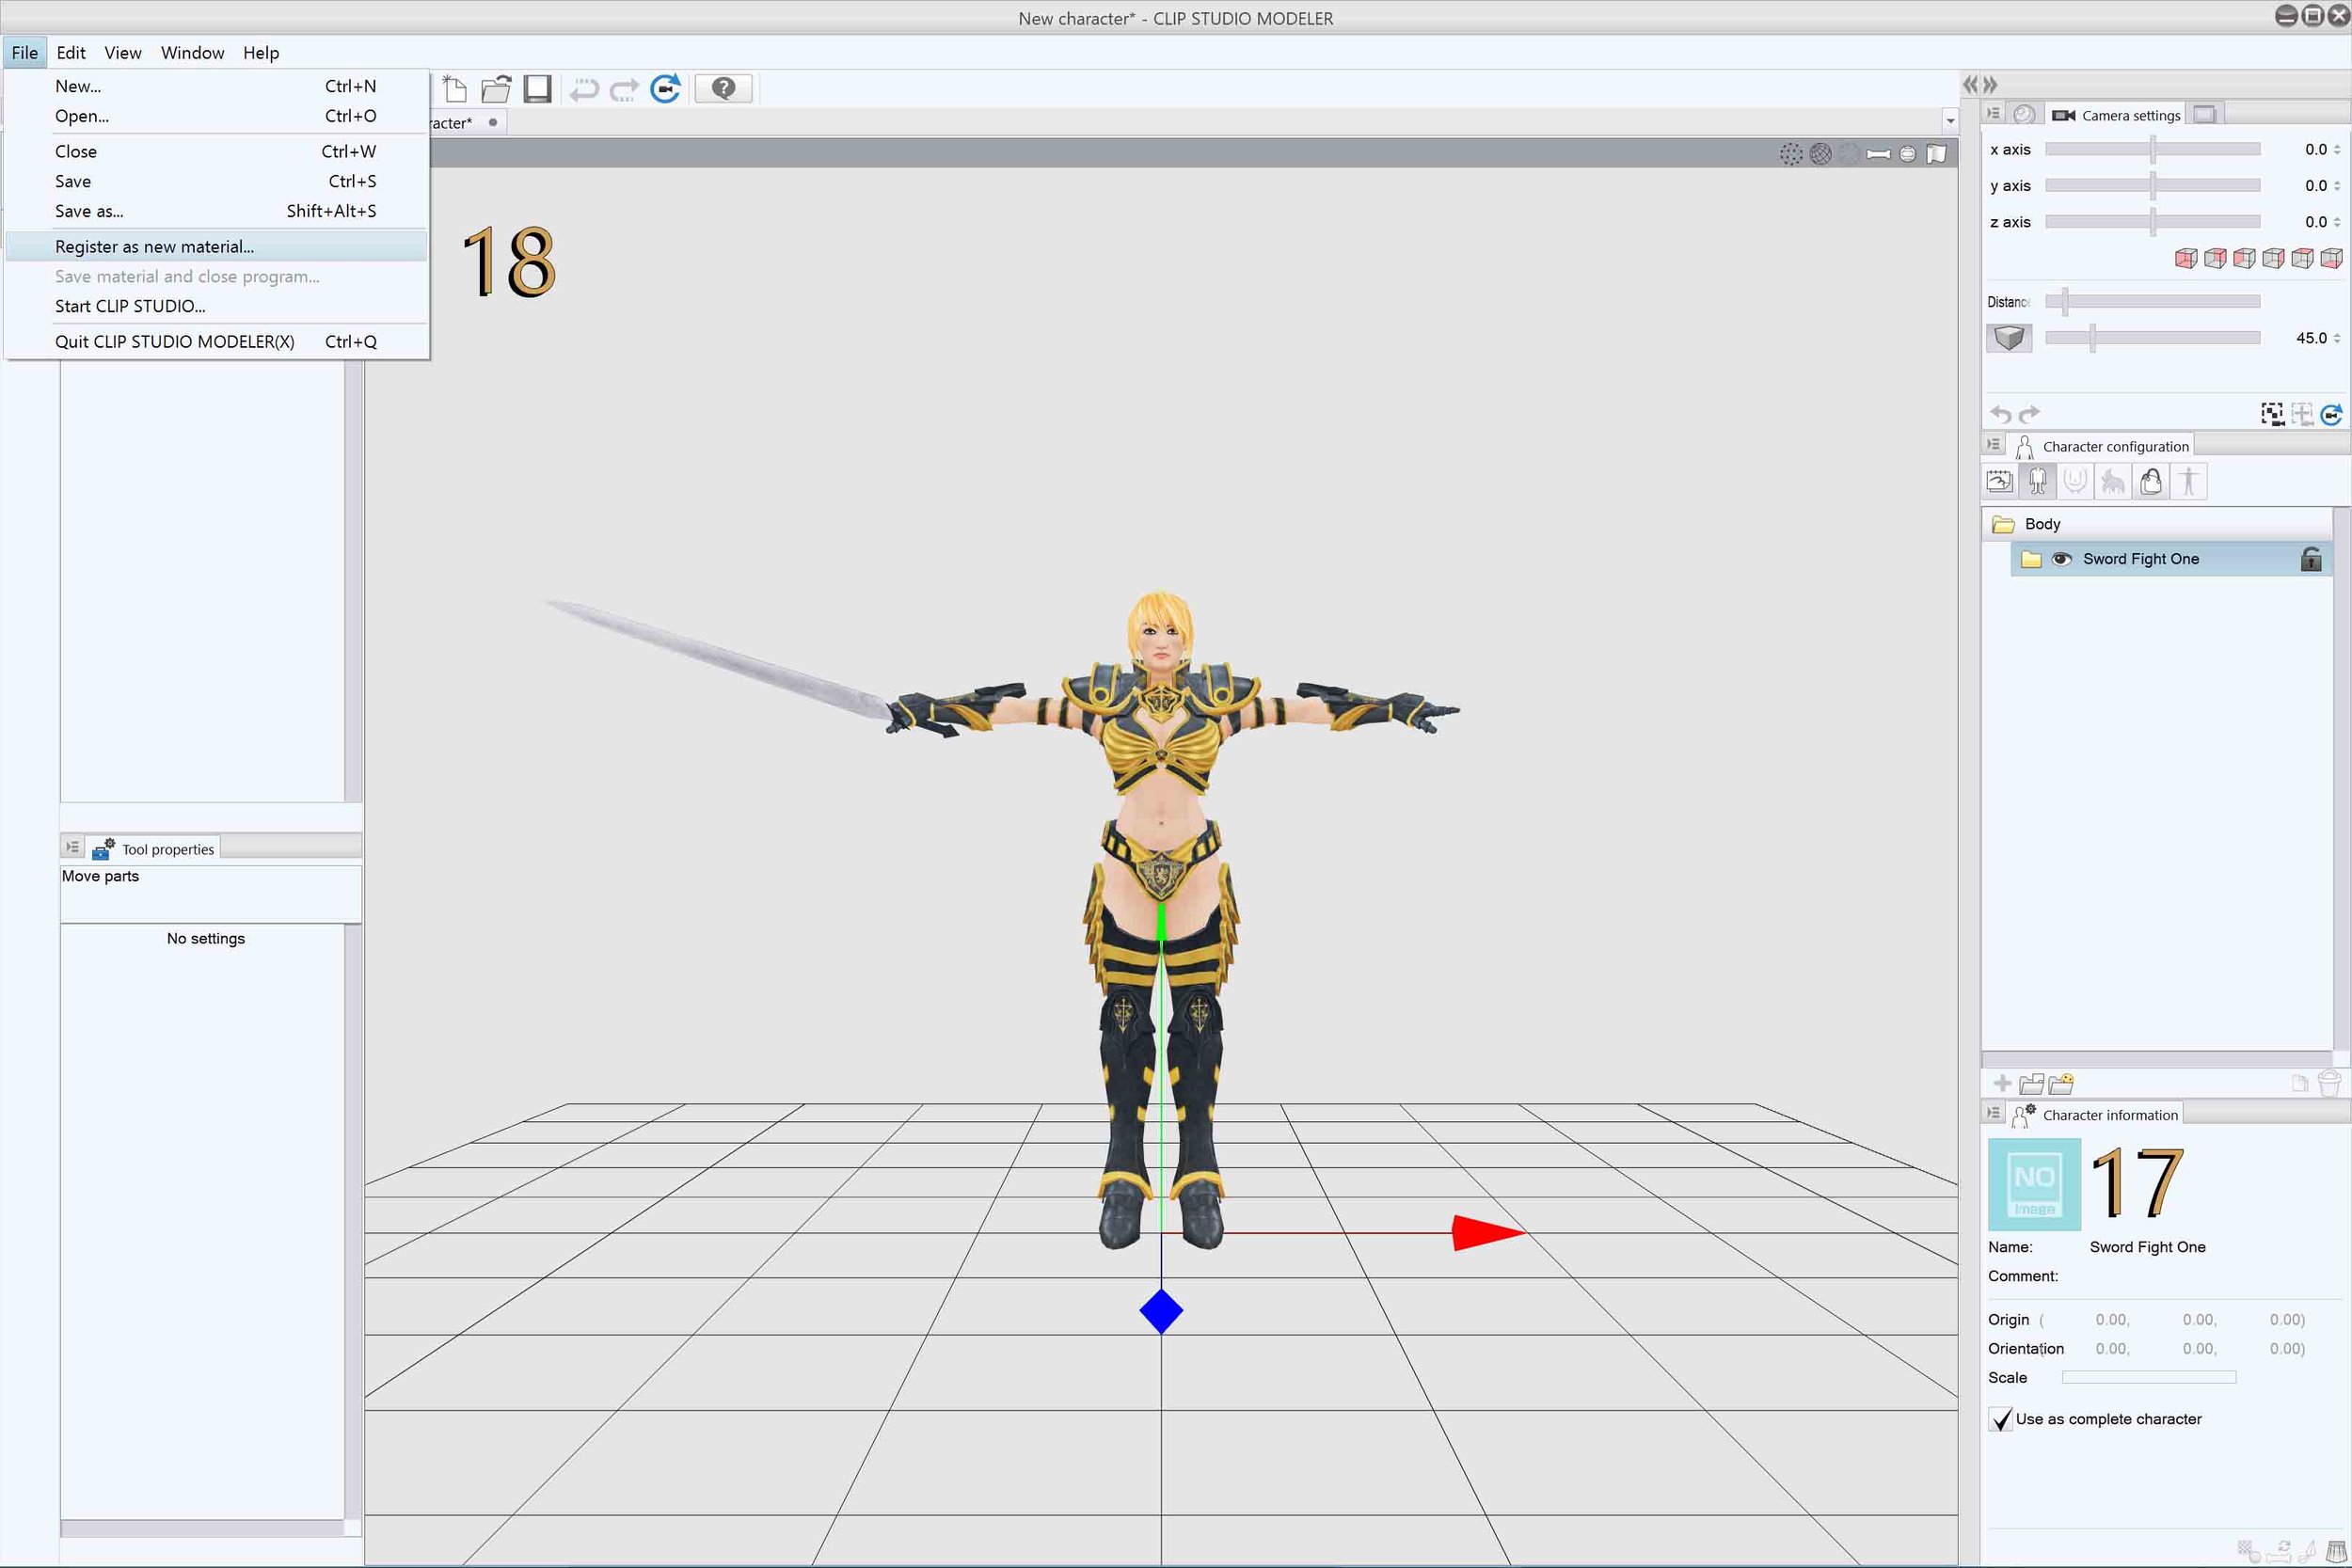
Clicking the blue icon in the Character information panel will allow you to save a screen shot for the object’s icon (17). Unfortunately, this doesn’t get imported into CSP so you’ll waste a step doing it here.
Save the file if you want to be able to edit it later or click on File>>Register as new material… to export it into Clip Studio Paint (18).
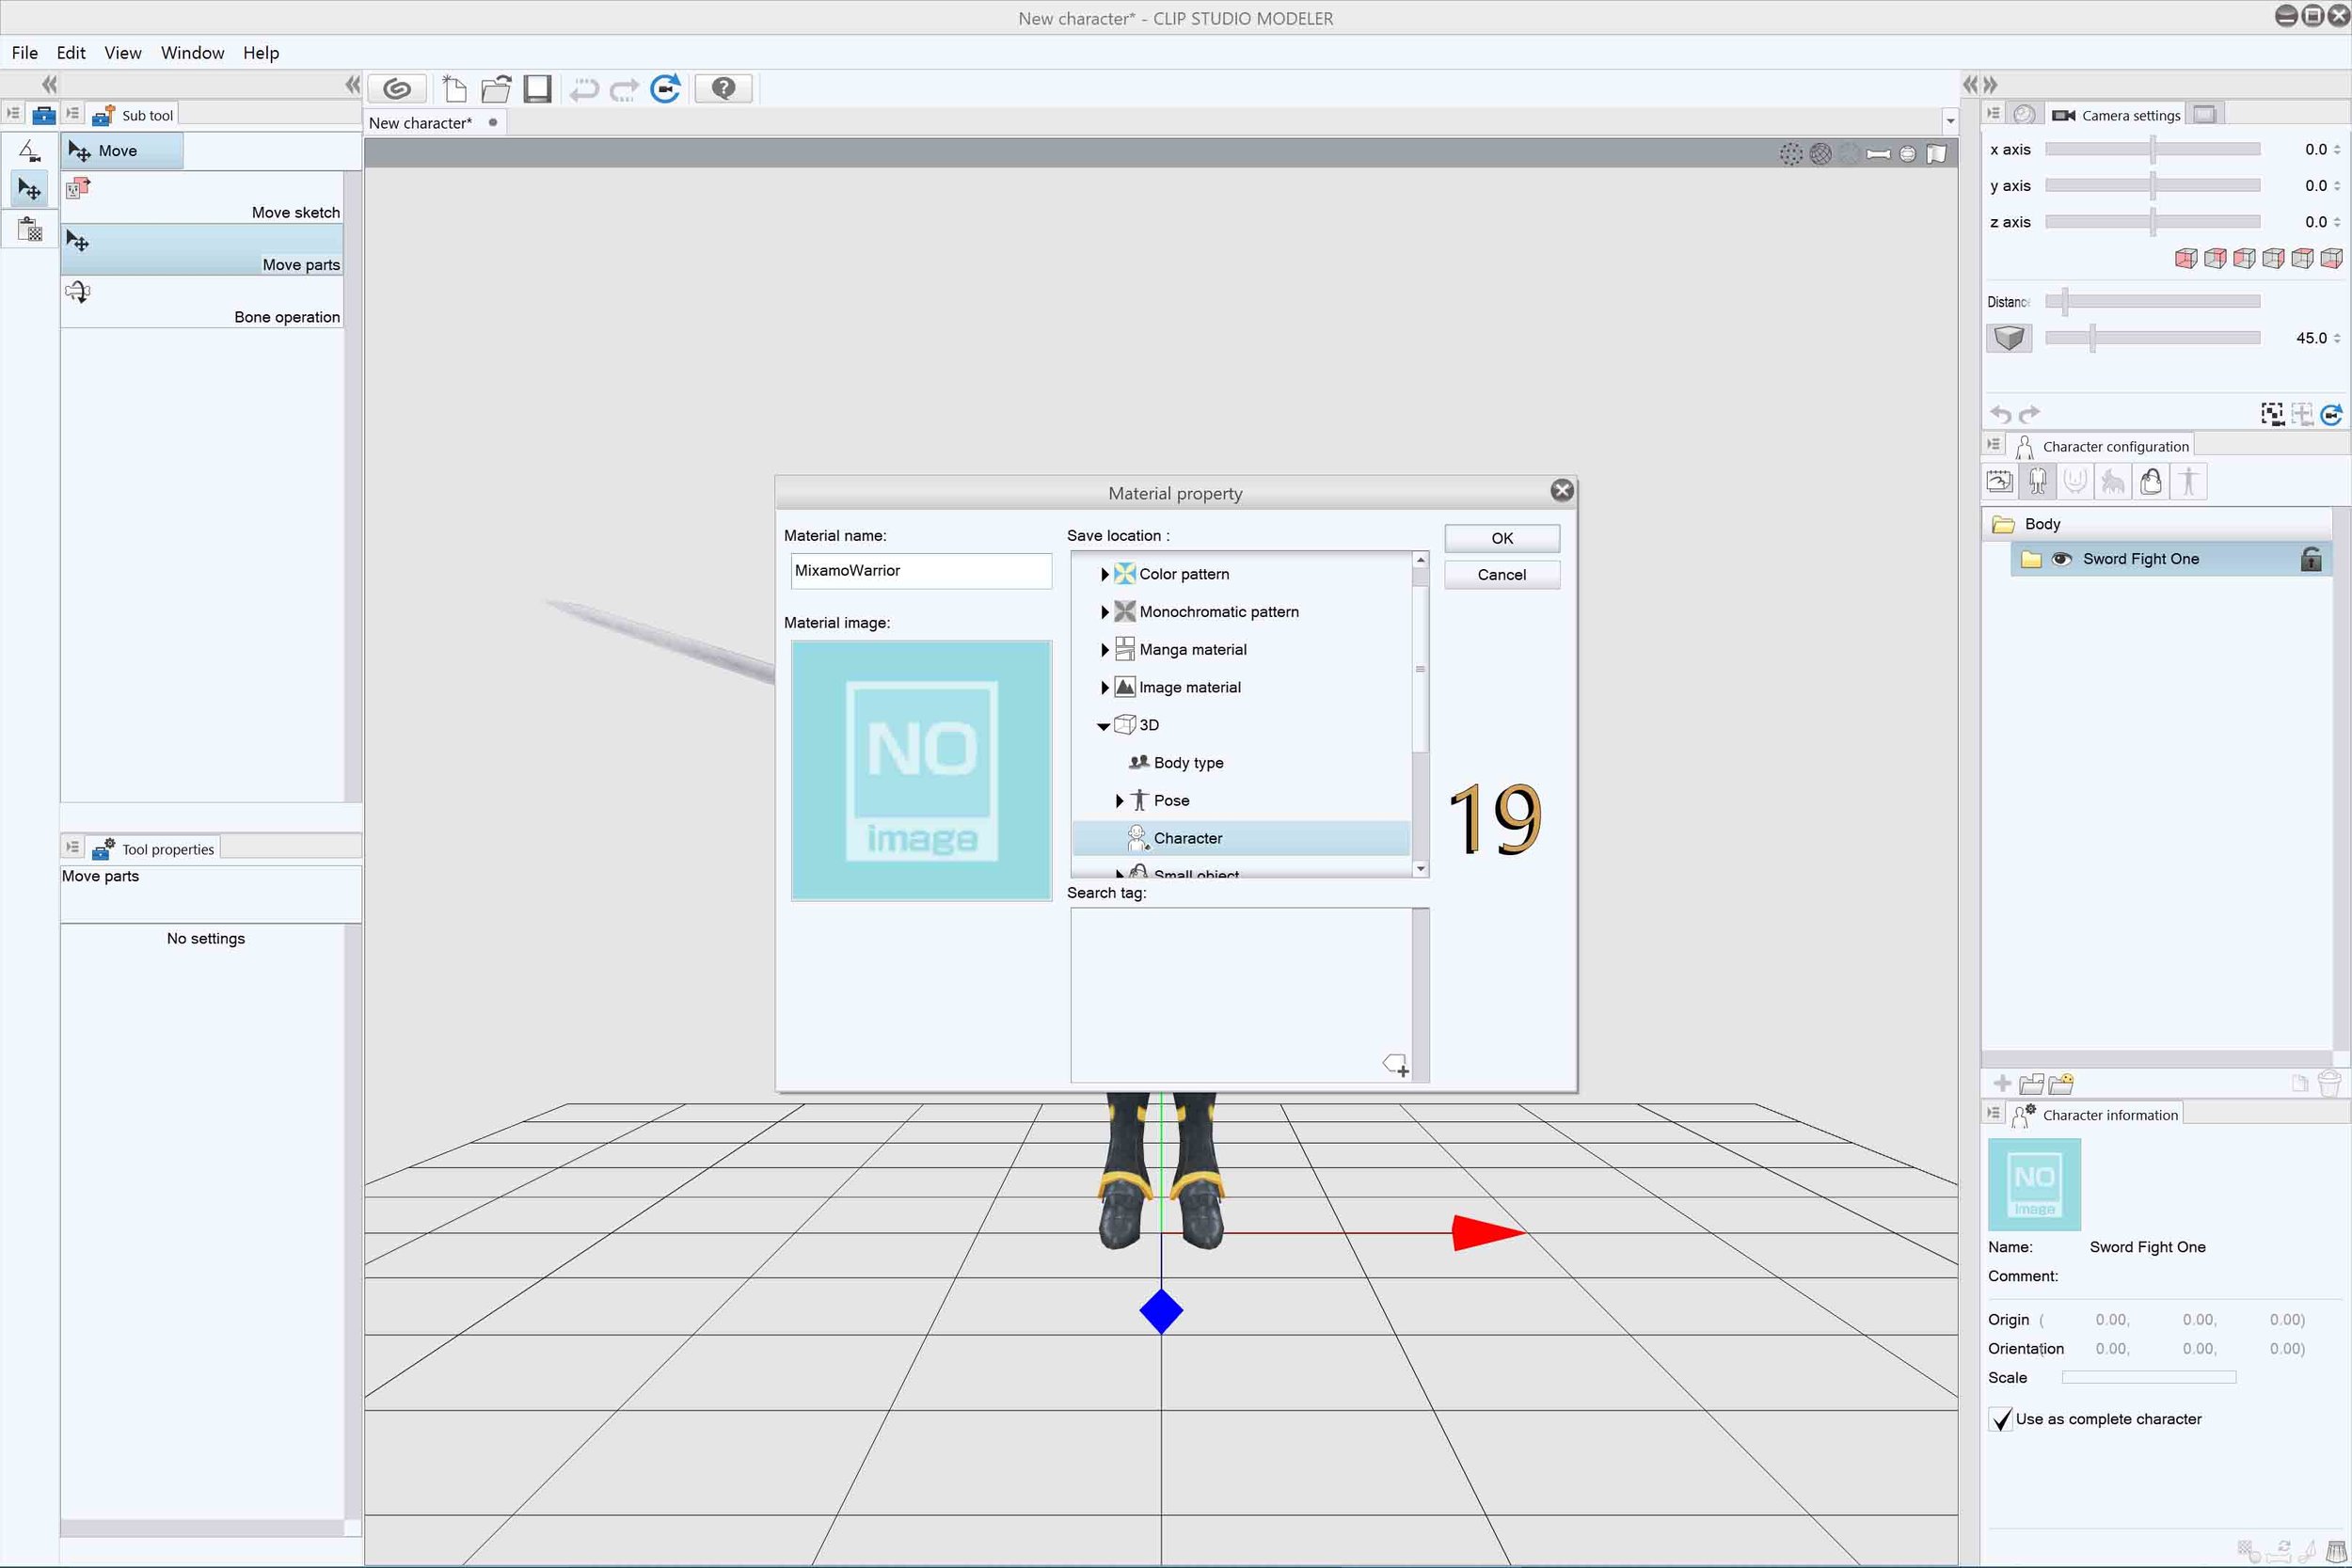
You’ll need to pick the appropriate destination in your library, such as 3D>>Character (19).
Importing and exporting a static object such as a background is similar, but you don’t need to map any bones.
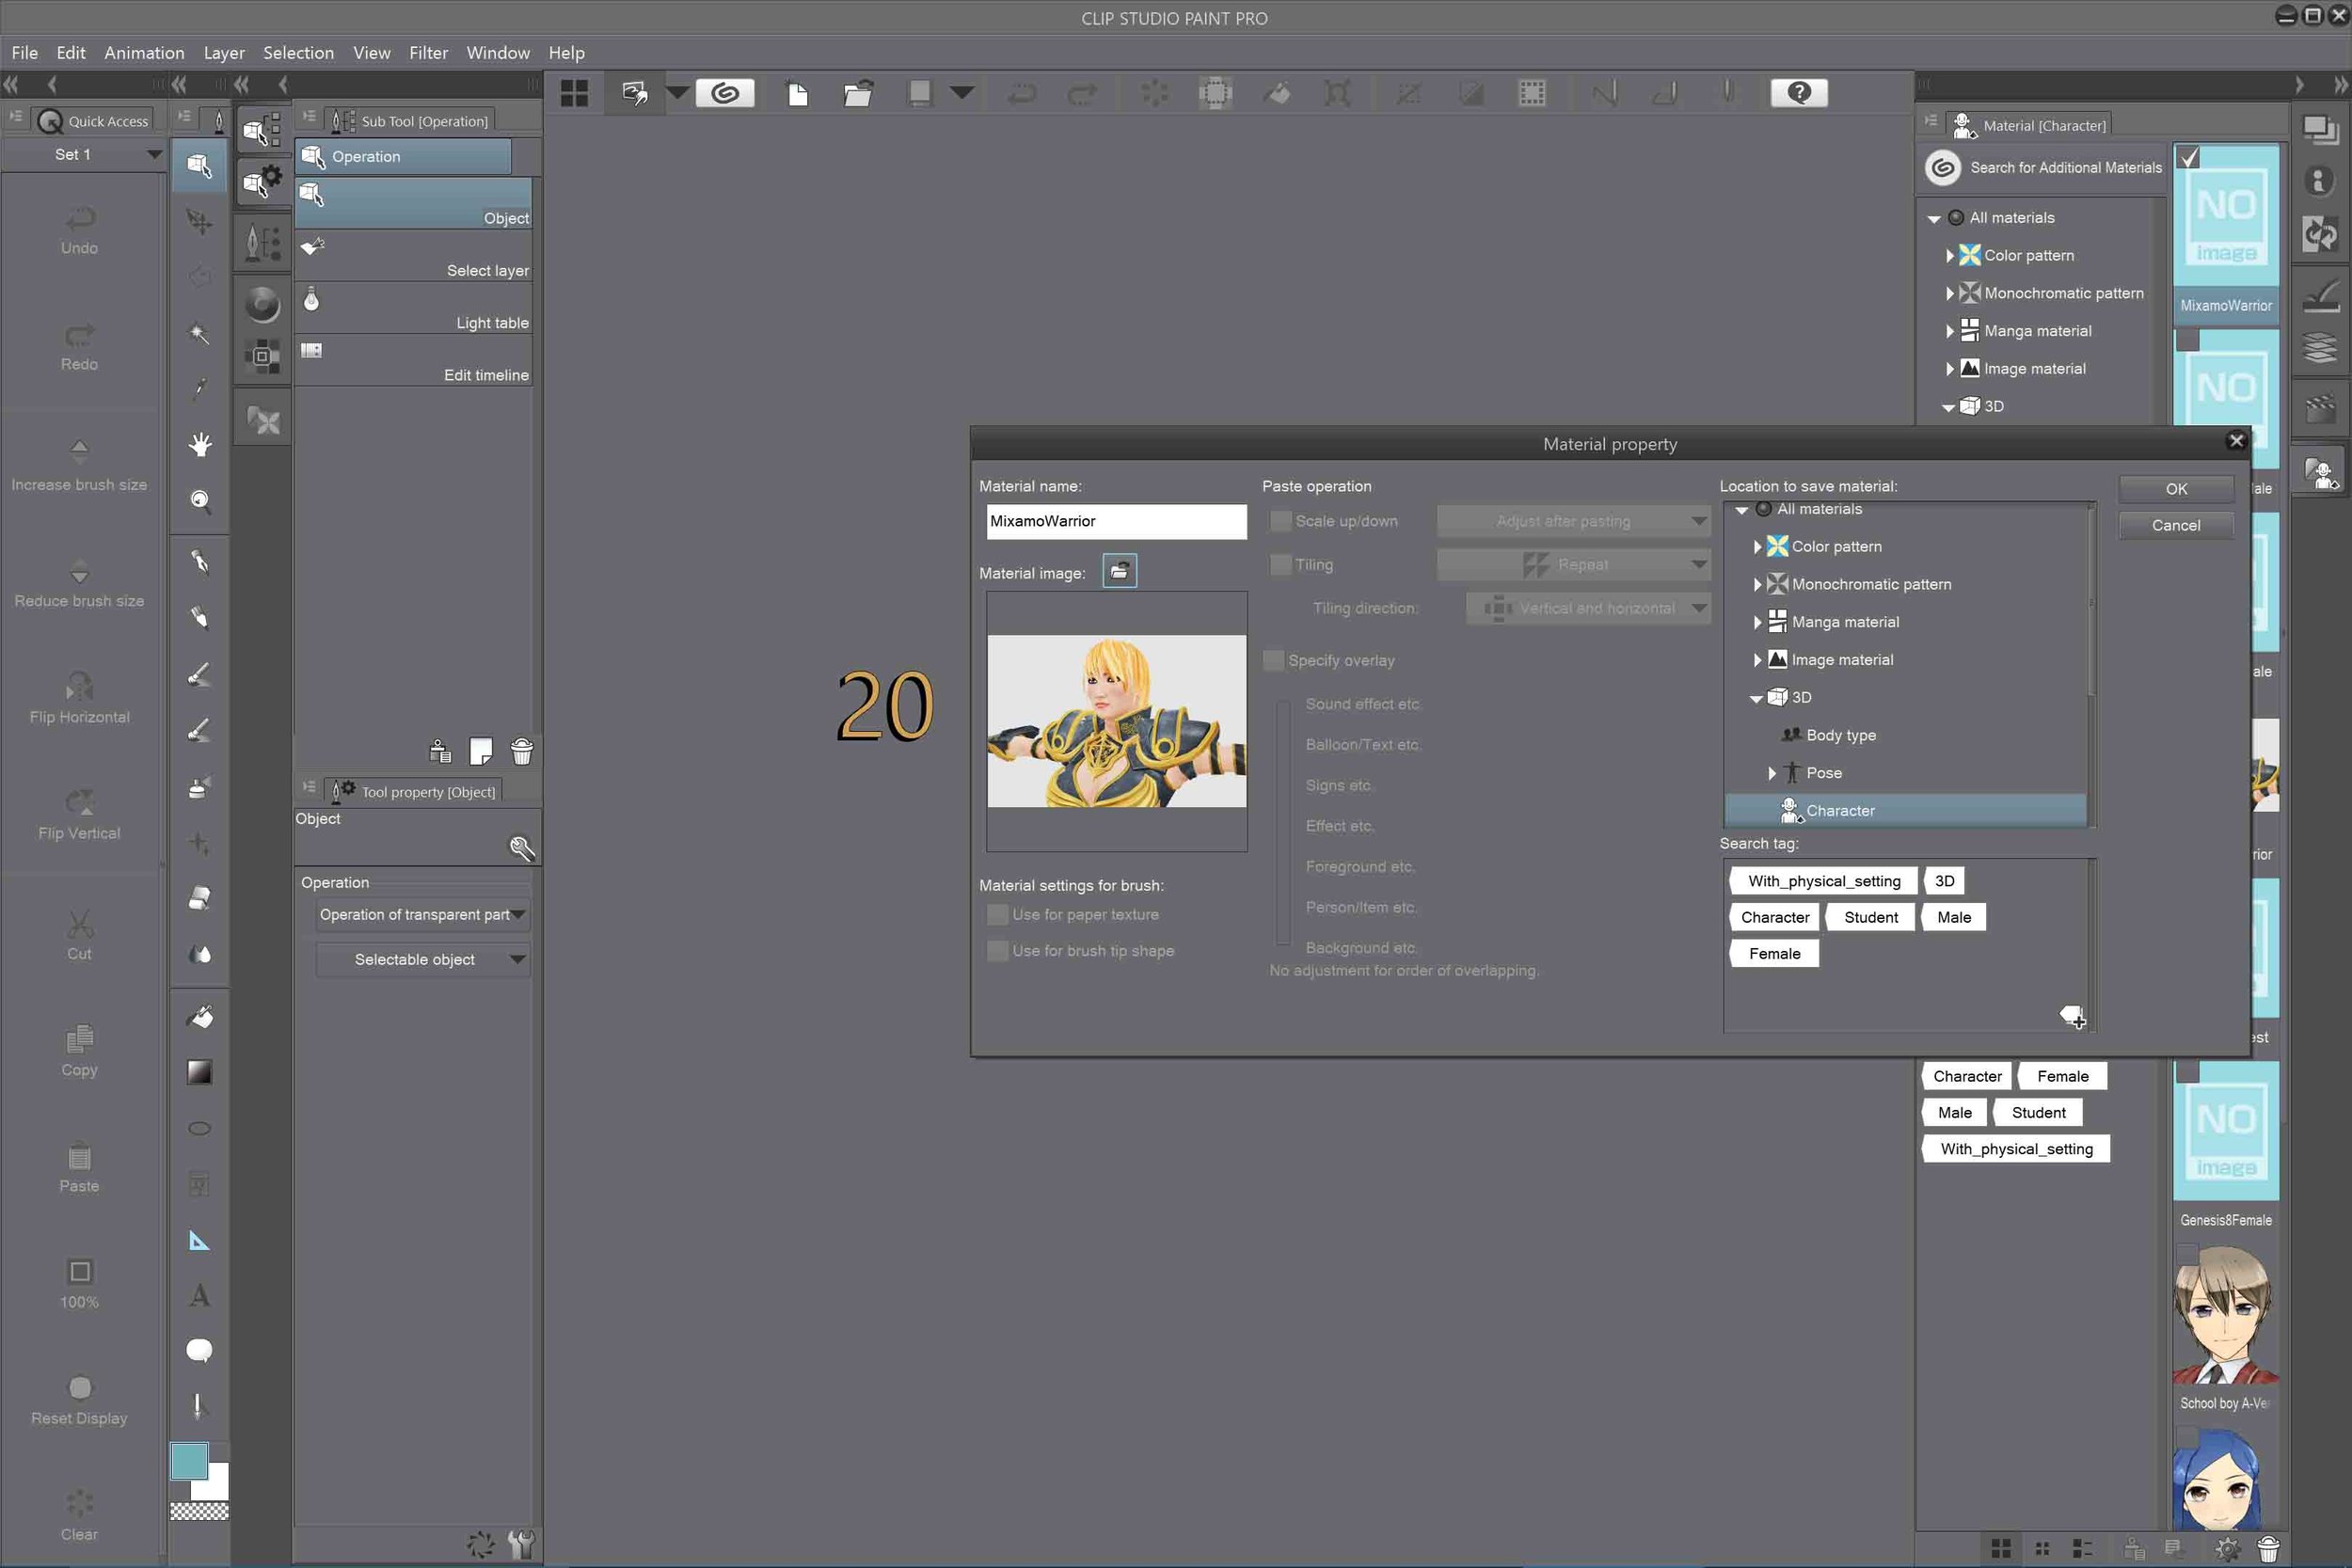
The next time you load Clip Studio Paint, your new object or character will be in the materials library. Double clicking the blue icon, you will open up the object properties panel where you can replace the generic icon with a screen shot of the object (20).
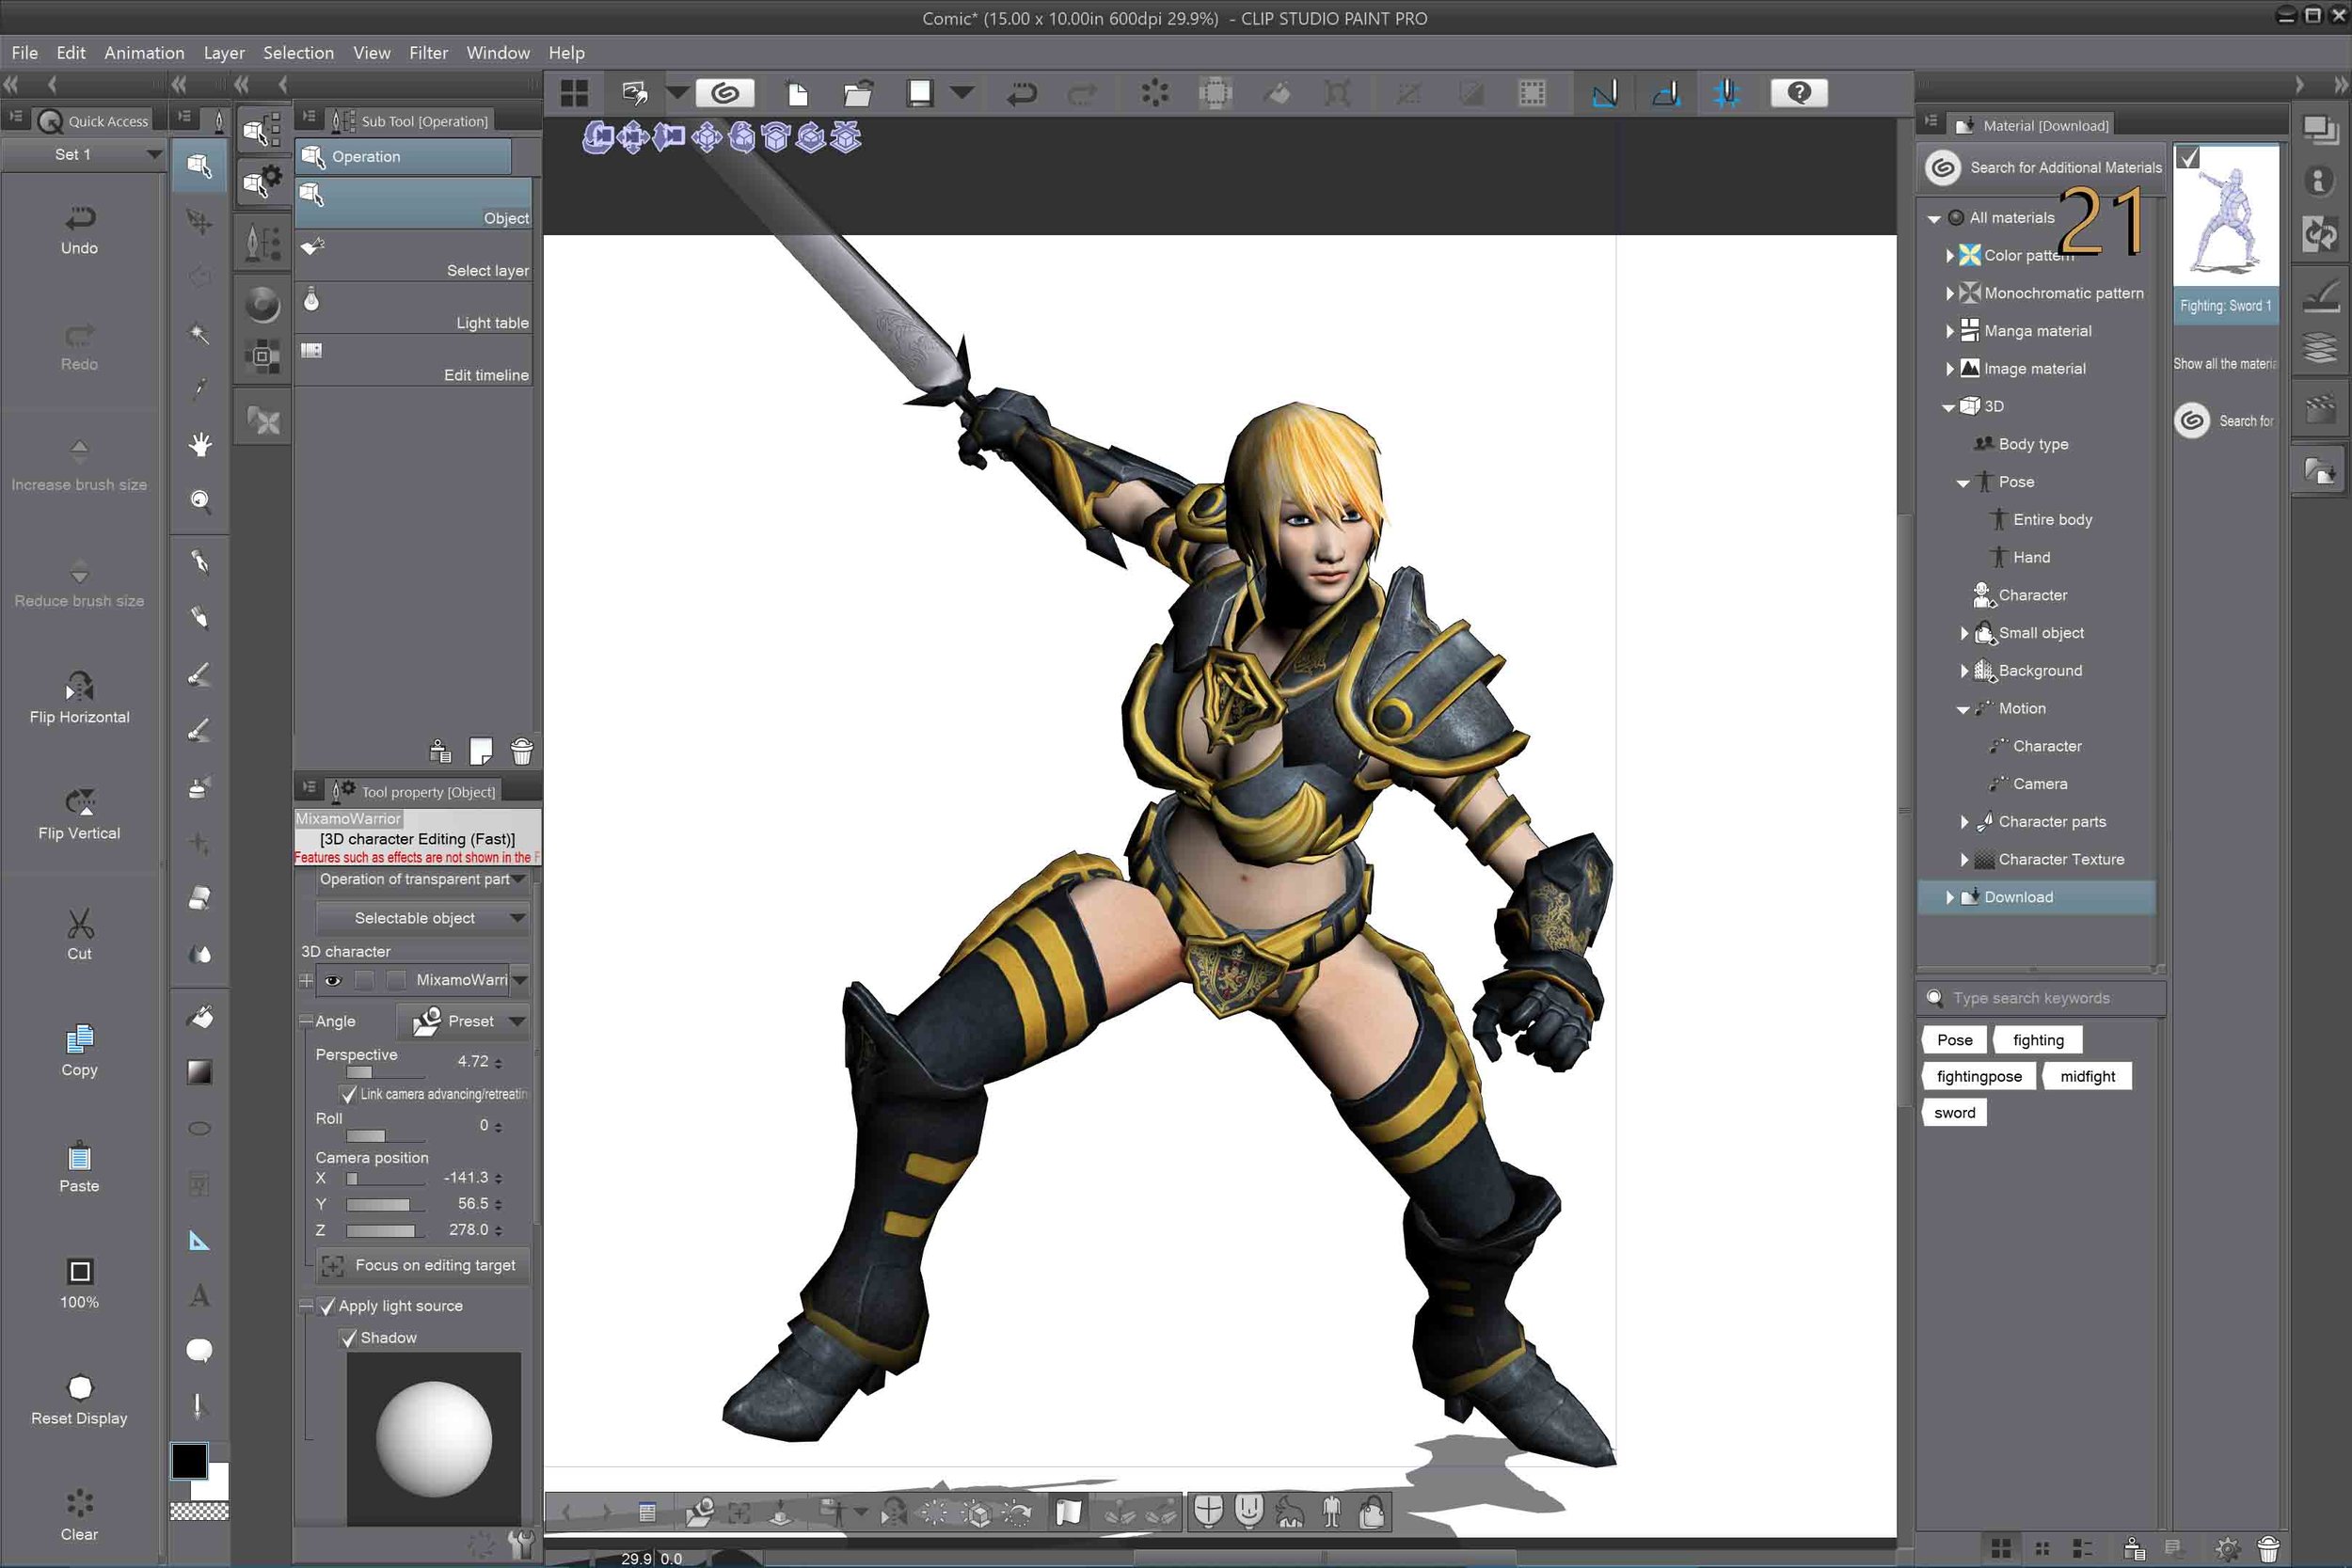
Once the character is loaded into your project, you can pose it with any available pre-installed or downloadable pose (21). And, of course, you can always continue to tweak your pose as necessary.
Clip Studio Paint's default 3d selection is fine, but stylistically limited to bishojo manga. If you like (or need) to incorporate 3d elements in your workflow, Clip Studio Modeler has opened up a world of possibilities.