When I was first approached by the folks behind TabletPCMouse a couple of months ago, I was frankly perplexed. The utility developed by Japanese developer Takashi Yamamoto creates a virtual trackpad on your Windows tablet's display (see demo video, right). 

We all know that desktop touch targets can be very small and difficult to hit accurately, especially on complex professional programs. Controlling the screen pointer with the virtual trackpad is indeed easier than attempting to tap with a finger. But whenever I'm in tablet mode, I'm seldom without my pen, so whatever the added accuracy, I find it's much faster to tap the pen tip directly onto the target.

The software also enables users to access a large array of customizable two-, three-, four- and five-fingered gestures which can be very "handy." (Pun intended). 

I thought this latter feature was very useful and I intended to write a note about the utility at that point, but it was a complex enough utility that I felt I couldn't do it justice with the time I had available, so it quickly fell off my radar.

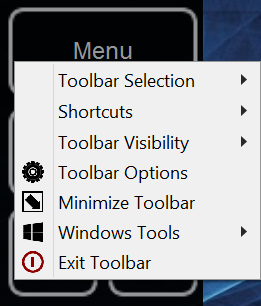
The developers persisted and contacted me again this week to offer a peek at the upcoming version 2.0 beta. My interest was piqued when I learned that this new version offers an ArtDock alternative called "Artist Pad." Development of the free utilities Toolbar Creator and RadialMenu, which I've covered extensively, has slowed in recent months, so it's nice to see a new option on the horizon.

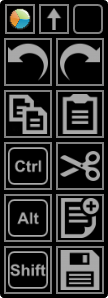
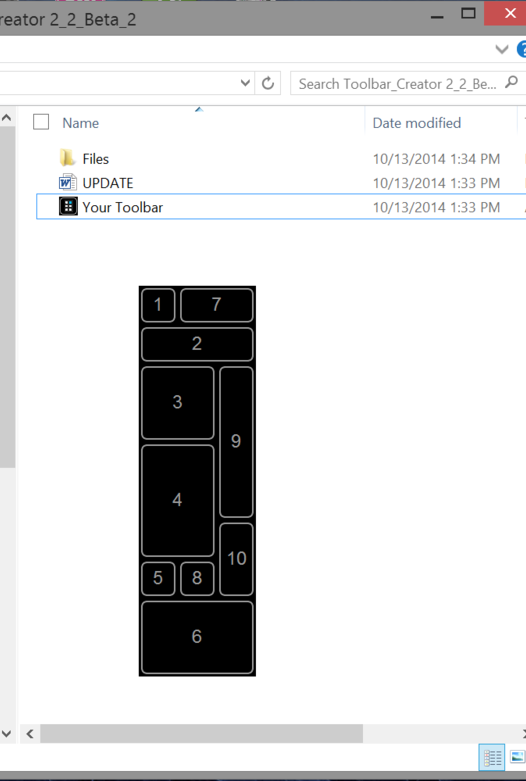
Once installed, TPCM makes it extremely easy to create customized Artist Pads with your favorite keyboard shortcuts. The layouts are saved as .ini files that you can load in and out as often as you like. I created the Photoshop Artist Pad here (see left) after only a few minutes of getting familiar with the utility.

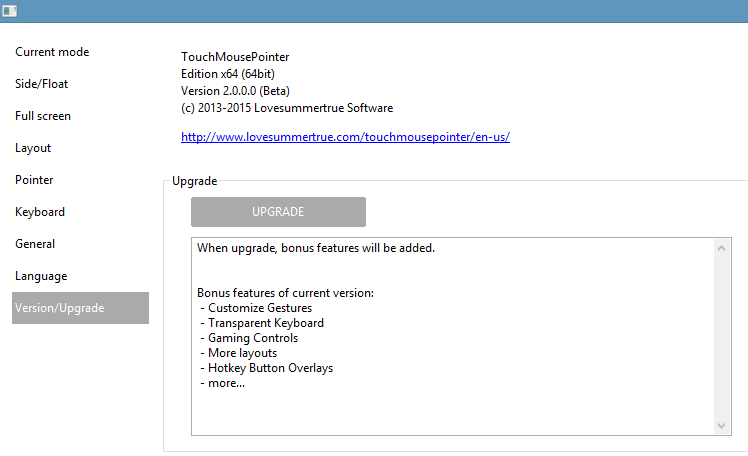
TabletPCMenu is free to download from the Windows App Store, but to unlock all its features, you'll want to pay the $10 premium. At this writing, the software is on sale for $4.99.

What's odd about the tool is that the app doesn't do much without the presence of the desktop add-on. It's this confusion about the way the two programs interact that kept me from writing about it earlier.

In case you'd like to give the utility a try, below is a step by step guide to getting the program up and running. (Apologies if the layout is weird. Squarespace's Layout Engine is giving me fits with this post!)

STEP 1. Download the Tablet PC Mouse Manager App from the Windows Store.

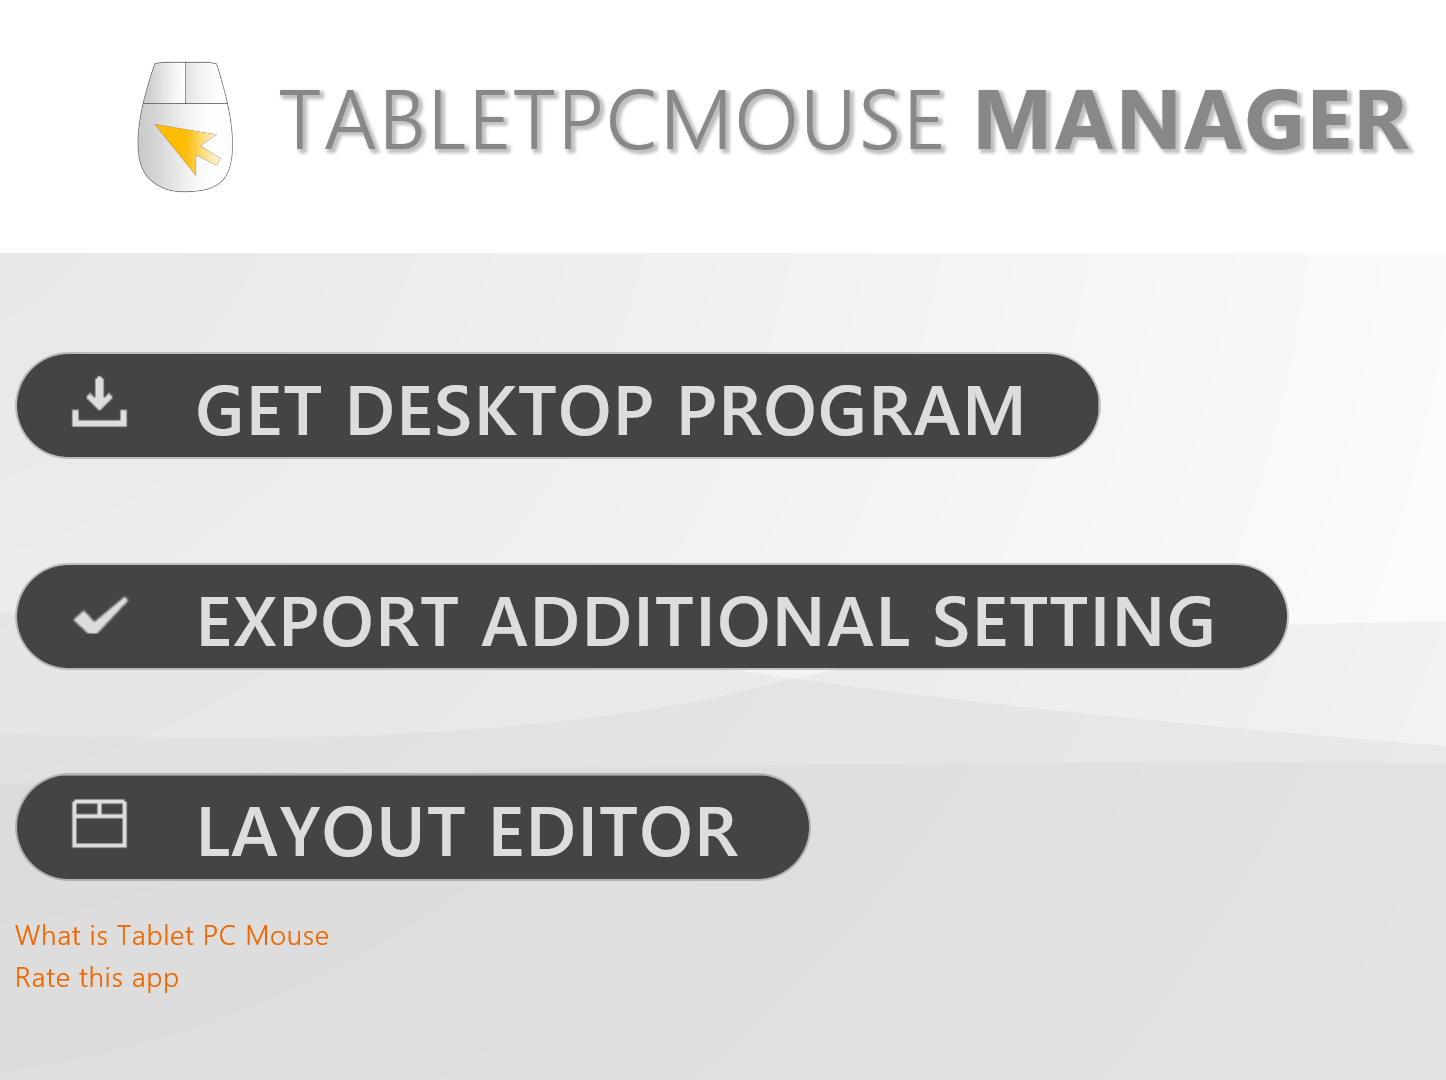
STEP 2. Run the App and select Get Desktop Program

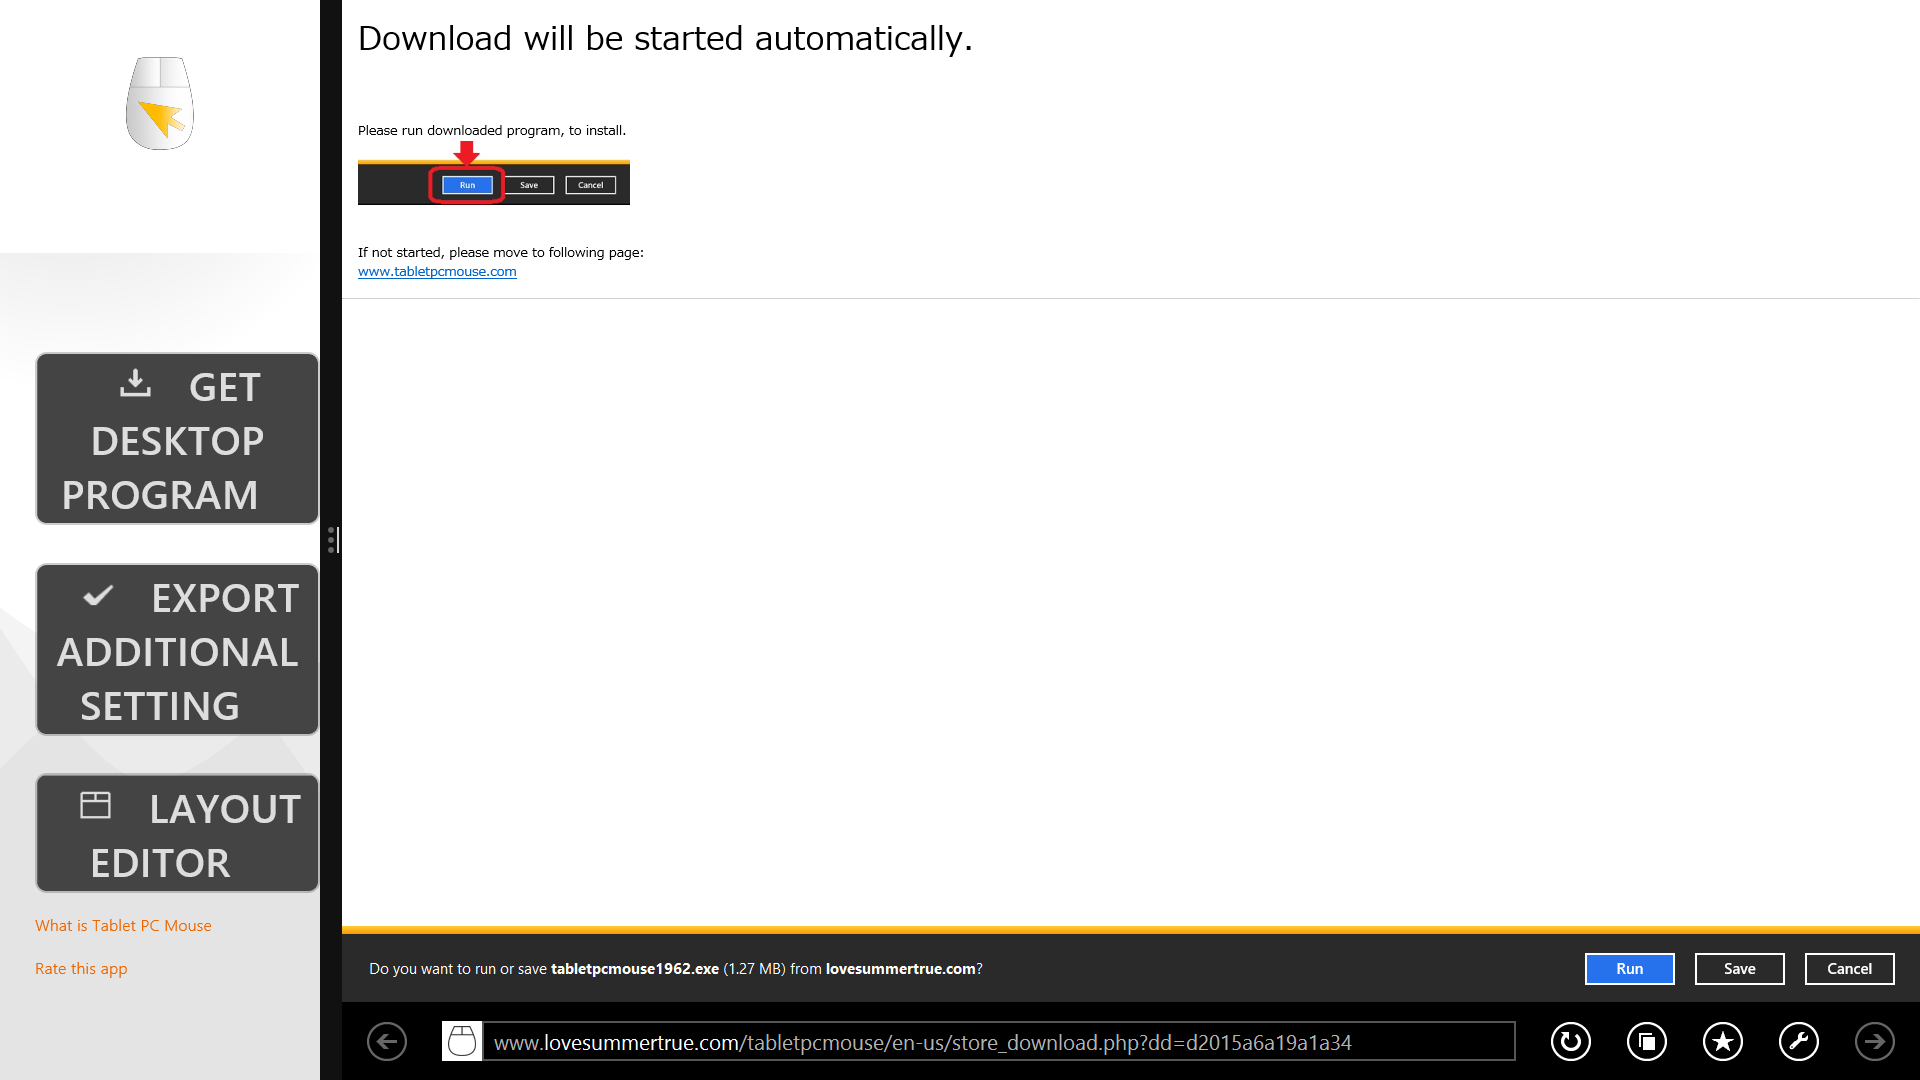
STEP 3. Download the desktop program. At the moment, this downloads the 1.9x version. When you register your email address, you will get the 2.0 beta and eventual update.


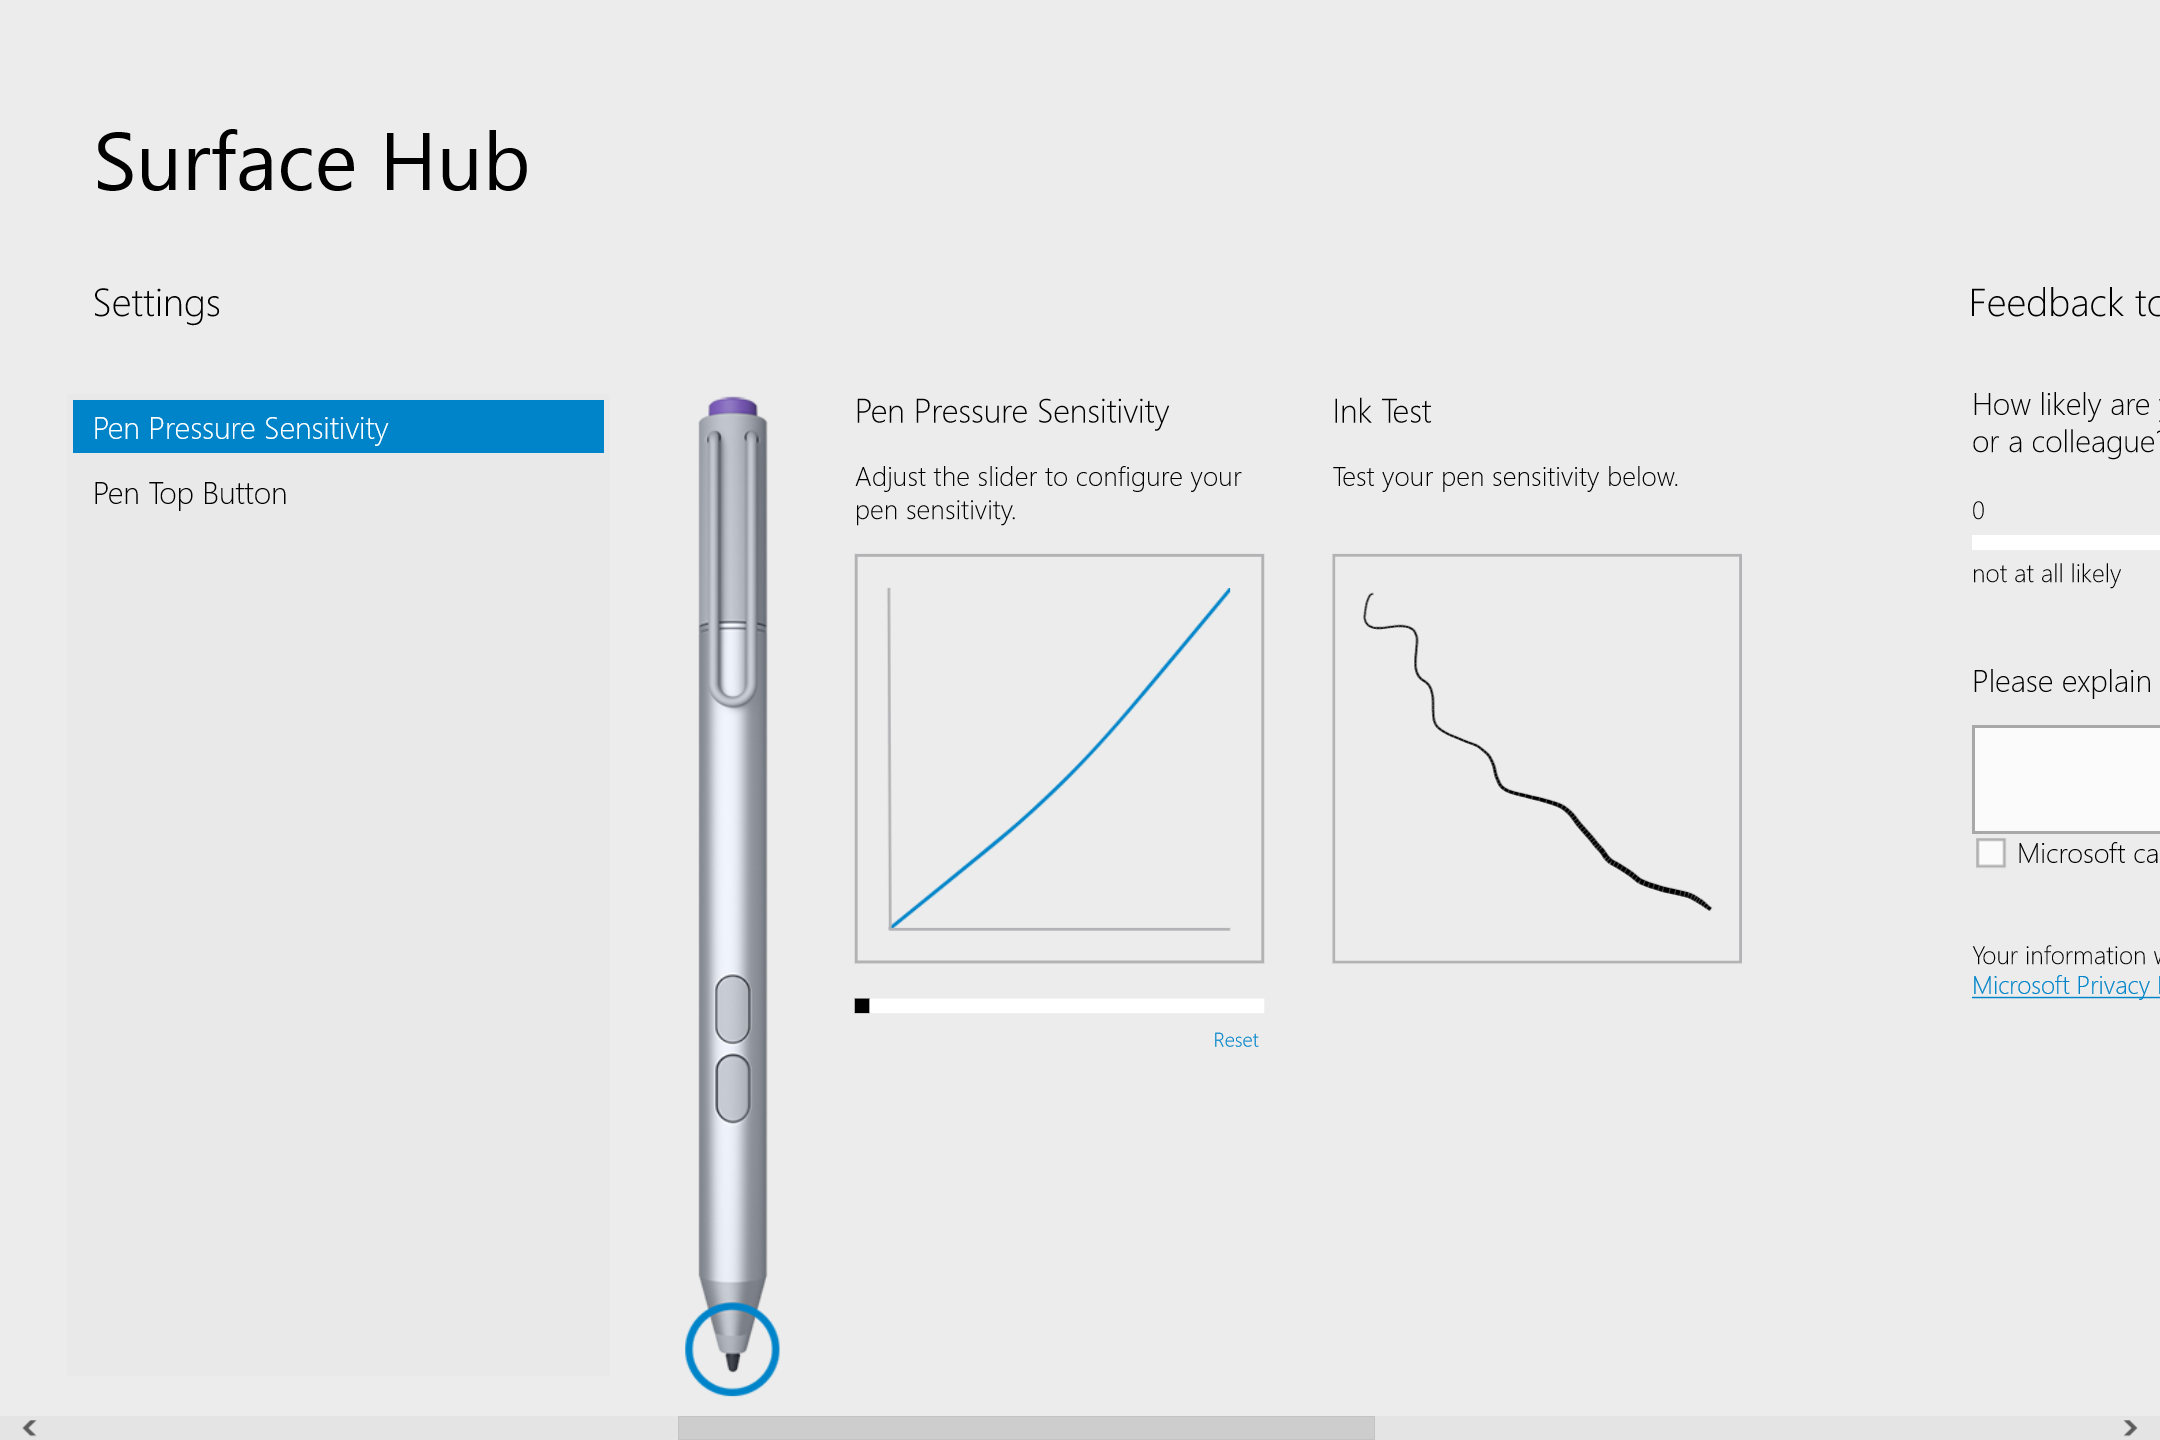
The settings (above) also offer customization of the pointer and virtual keyboard, but for the remainder of this post, I'll focus on customizing the ArtistPad.

STEP 4. Install the desktop application.

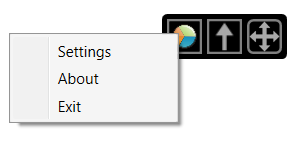
STEP 5. Access the TabletPCMouse settings from the notifications tray.

STEP 6. Insert your Bonus Code to unlock commercial features.

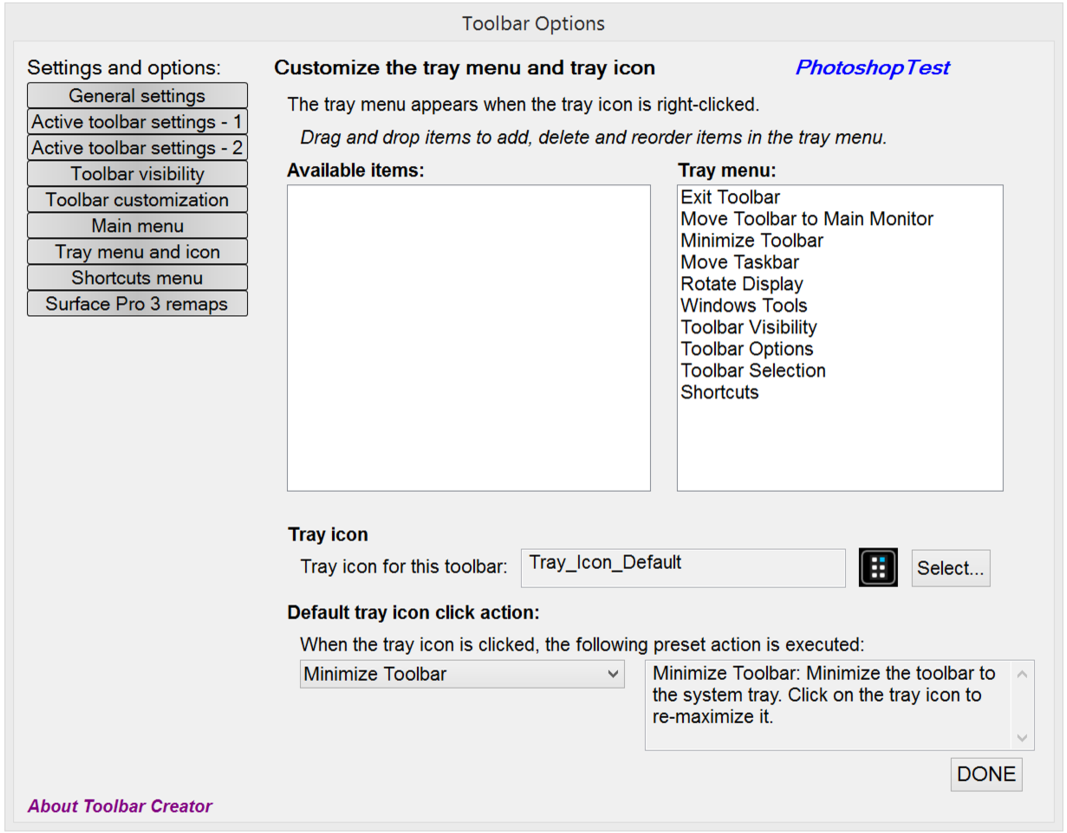
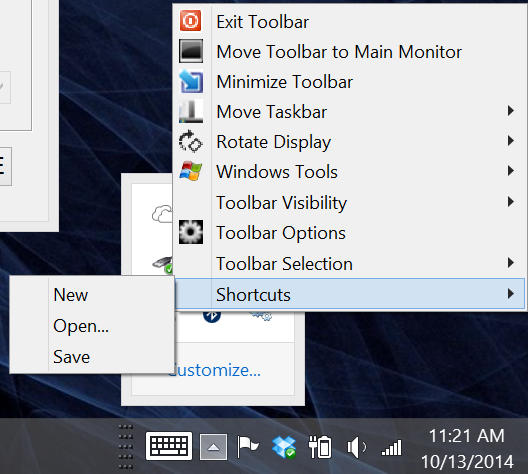
Once inside the settings menu, TabletPCMouse offers a wide and potentially confusing array of options (click on any of the images below to see larger versions).

My advice is to take your time with each screen, testing the settings one at a time until you're comfortable with the options.

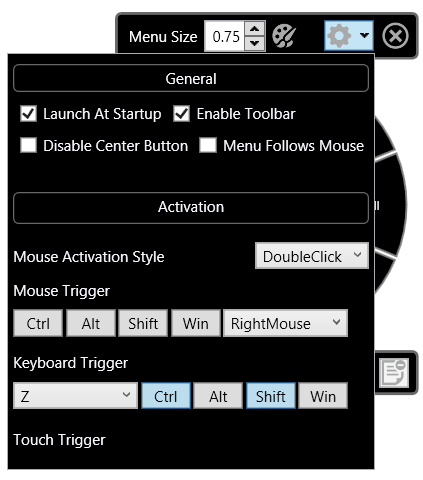
To access the ArtistPad, tick it in the Current Mode (left).

Side Float and Full Screen settings (below) allow you to set up customized gestures. This is a really great feature that should be part of the OS. The developers state that TabletPCMouse is compatible with Windows 10, so this may end up being a lifesaver if Microsoft removes a gesture from 8.1 that you've grown to love.

In one of the oddest design choices of the utility, selecting the Layout settings (left) only offers the opportunity to edit the layout in the Modern app (below).

By default, the layout screen opens up the Float trackpad (above). I wasn't able to load the Artist Pad from the Layout pulldown, so it took a little trial and error by loading the Artist Pad on the desktop and then selecting "Edit layout with store app" (above left).

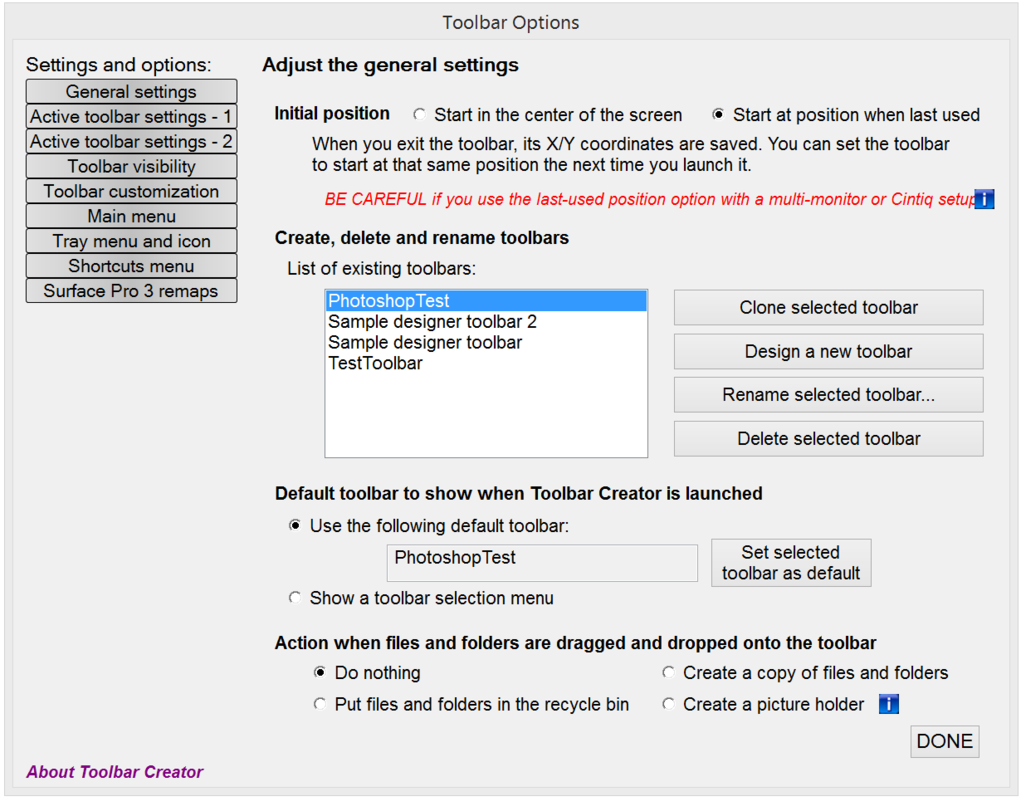
Once the Artist Pad is available in the Layout window, save a new .ini file in case you want to go back to the original settings.

Customizing your Artist Pad is very simple: just click on a button (below left), enter its keyboard equivalent and modifier keys and size, position and rename it. In the example below, tapping the Open button will send the Ctrl-O shortcut.

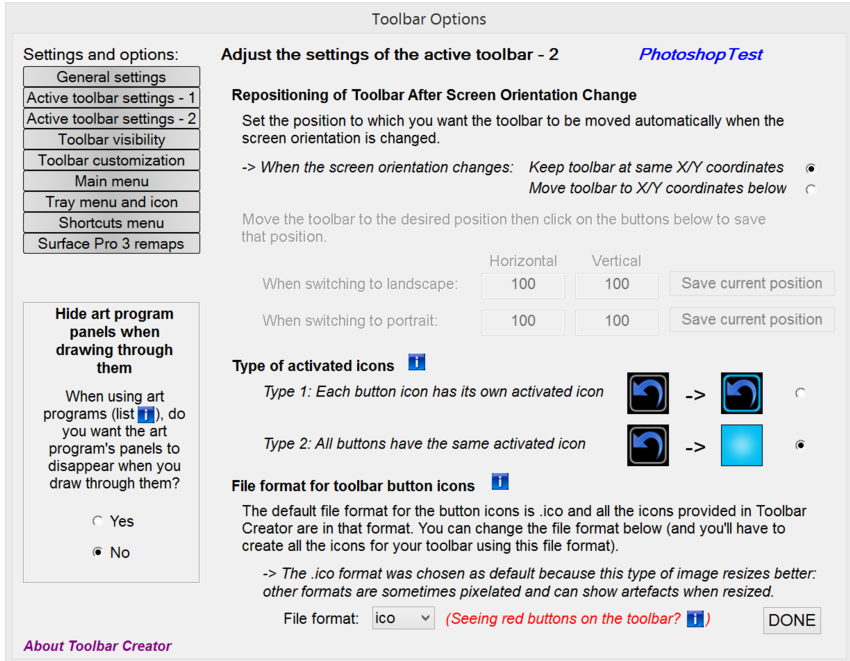
By default, the Artist Dock buttons are 15 units tall, but in order to add many more buttons, I reduced the height to 7. At present, it looks like Artist Pads are limited to two columns.(CORRECTION: The pad can contain more columns, but I haven't figured out how to do so.)

You can drag the buttons around as you like, but they don't snap consistently. Just pay attention to the x and y coordinates to keep your buttons evenly spaced. It would be nice to be able to move multiple buttons at once or add graphical separators to keep the items better organized.

When you have a button you like, just Clone it to add a similar one.

Once your Artist Pad is completed, save the .ini file and load it in the desktop settings. (I told you the bouncing back and forth between apps is weird and a little tedious).

When the Artist Pad is loaded (left), it has a hamburger menu icon in the top left that allows you to quickly load settings or jump to the layout app. The blank area next to the hamburger menu allows you to click and drag the pad around the screen.

You can set the Artist Pad's opacity in the Settings tab and the Minus icon will minimize it.

For a beta product, TabletPCMouse is very robust. It works with both Wacom and N-Trig devices. Be aware that on N-Trig tablets like the Surface Pro 3, the pen's proximity to the screen will disable touch. On Wacom tablets, touch is only disabled at the moment that the tip touches the screen. In any event, this means that the keystroke can't be held down as you use your pen. 

TabletPCMouse mitigates this limitation somewhat by toggling modifier keys like Alt and Shift. For those shortcuts, once they are tapped they will stay depressed until they are tapped again.

This is a very worthwhile utility and the developers are eager to get feedback from the SurfaceProArtist community. The first 20 commenters on this post will receive free licenses in order to provide more feedback and advice on the beta. For more details visit TabletPCMouse.com

Posted
AuthorRick Rodriguez
53 CommentsPost a comment

Earliest adopters who rushed out to install Adobe CC 2015 updates Monday night may have been surprised to find that this year's installer erases previous CC versions on the hard drive.

This is probably a welcomed convenience to most users who don't need multiple versions of software taking up useful drive space, but if you have a mission critical file or plug-in that requires a specific version, you might be out of luck if you blow away your older installation.

I had installed CC 2015 on three systems before I realized I was removing CC and CC 2014 programs.

Keeping the older versions is straight forward, but requires paying attention early in the update process. 

When the Adobe Creative Cloud application notifies you that new CC 2015 apps are available, you can update the programs individually or select Update All.

When the Adobe Creative Cloud application notifies you that new CC 2015 apps are available, you can update the programs individually or select Update All.

By default, the installer will remove prior CC versions (CS 6 and earlier are not affected). To keep your older installations, select Advanced Options.

By default, the installer will remove prior CC versions (CS 6 and earlier are not affected). To keep your older installations, select Advanced Options.

Untick the Remove old versions option and then select Update. Be prepared to wait a while as all of my installations thus far have taken a couple of hours.

Untick the Remove old versions option and then select Update. Be prepared to wait a while as all of my installations thus far have taken a couple of hours.

Most users will likely appreciate the freed up hard drive space, so this method should only be applied if you absolutely need to continue to access older CC programs.

Most users will likely appreciate the freed up hard drive space, so this method should only be applied if you absolutely need to continue to access older CC programs.

Posted
AuthorRick Rodriguez
CategoriesTips

UPDATE: Surface Pro 3's right pen button now calls up the radial menu correctly. See below.

* * * *

ORIGINAL POST

One of the more popular recent additions to Wacom's Feeldriver is the radial menu, a handy set of shortcuts that can be called up with the click of a pen button.

The default RadialMenu offers eight commonly used functions that will apply to most applications. Each wedge is customizable and a profile can be created on an application-specific basis.

The default RadialMenu offers eight commonly used functions that will apply to most applications. Each wedge is customizable and a profile can be created on an application-specific basis.

The radial menu had only been available on Wacom's professional devices until May of this year and its surprise appearance in the enhanced tablet pc driver was another competitive advantage the company had over N-Trig equipped devices like the Surface Pro 3.

We were hoping an SP3 pen menu would be part of Microsoft's recently released Surface Hub, but alas it didn't make the cut and a company spokesman was noncommittal  about it ever appearing. Some within the Surface team have told me they worry that an OS-level radial menu may conflict with context menus and/or software-specific marking menus like those found in Autodesk Maya.

Whether those concerns are valid or not, there's now a powerful utility that brings a highly-customizable radial menu to all devices and throws in a toolbar/ArtDock creator as well.

RadialMenu is the brainchild of independent software/game developer Clint Huegel, who wrote the utility for his Motion Computing LE1700. Fortunately for us, the program appears to work with a wide variety of hardware and software combinations.

"RadialMenu is a small project I started to alleviate aggravations I encountered while using my TabletPC," Huegel writes on his website. "The goal was to emulate the radial menu that Wacom distributes with some of their products but with per application menus. Since that goal was met a Toolbar was added as well." 

The RadialMenu application also includes a toolbar that can be easily customized.

The RadialMenu application also includes a toolbar that can be easily customized.

In this view, the toolbar is collapsed with the center (Up arrow) icon. The arrows on the right allow you to move the toolbar around the screen. Tapping on the pie icon switches to the radial menu. Right-clicking on the radial icon brings up the set…

In this view, the toolbar is collapsed with the center (Up arrow) icon. The arrows on the right allow you to move the toolbar around the screen. Tapping on the pie icon switches to the radial menu. Right-clicking on the radial icon brings up the settings options. See below.

The RadialMenu settings. The Menu Size allows you to scale the wedges. Along the bottom, you can create, copy or delete application profiles.

The RadialMenu settings. The Menu Size allows you to scale the wedges. Along the bottom, you can create, copy or delete application profiles.

The RadialMenu's options are set in this window. Menu Follows Mouse attaches the menu to the pen cursor, although I had trouble reaching the commands in the right half of the pie with this option set. As a utility in development, RadialMenu still ha…

The RadialMenu's options are set in this window. Menu Follows Mouse attaches the menu to the pen cursor, although I had trouble reaching the commands in the right half of the pie with this option set. As a utility in development, RadialMenu still has some issues to be ironed out on various devices. I haven't been able to trigger the menu with a pen click alone on the Surface Pro 3. I use the keyboard trigger shown here (Ctrl-Shift-Z) and then tap to switch between the toolbar and radial menu.

UPDATE 10/22/15 RadialMenu's developer continues his torrid pace of development and today released version 0.2.3.83 which corrects many of the issues I identify above. Now, setting RadialMenu to load on startup on my Surface Pro 3, I can hold down the right pen button and tap on the desktop to call up the radial menu. Right button + tapping again (away from the center and the command wedges) brings up the standard Windows context menu. Right button + tapping on the center will call up the RadialMenu settings.

Problems persist with Menu Follows Mouse. When the UI is scaled to 100% or 125%, the radial menu icons can be accessed normally, but at 150% or above, I can't reach the lower right icons.

Look for alternate version 0.2.3.83 x64 at http://radialmenu.weebly.com/download.html I wasn't able to run the standard version listed on that page.

To customize the individual RadialMenu wedges, right click the wedge to edit. In addition to several preset options, you can also define a hotkey toggle or create a Macro command (see right).

To customize the individual RadialMenu wedges, right click the wedge to edit. In addition to several preset options, you can also define a hotkey toggle or create a Macro command (see right).

Editing the functions of the toolbar works the same way as the radial menu. Just right click and select your desired function.

Editing the functions of the toolbar works the same way as the radial menu. Just right click and select your desired function.

By default, the toolbar consists of five rows and two columns. The individual buttons can be scaled and the top row of icons can be individually hidden. Auto collapse will shrink the toolbar when you mouse away from it.

By default, the toolbar consists of five rows and two columns. The individual buttons can be scaled and the top row of icons can be individually hidden. Auto collapse will shrink the toolbar when you mouse away from it.

Expanding the number of available items in a toolbar is a simple matter of increasing the available rows and columns.

Expanding the number of available items in a toolbar is a simple matter of increasing the available rows and columns.

If you don't like the pie wedges of the default RadialMenu, the size, shape and color can be edited in a wide variety of ways.

If you don't like the pie wedges of the default RadialMenu, the size, shape and color can be edited in a wide variety of ways.

The developer may have set out to emulate Wacom's radial menu, but it's clear that this utility is significantly more powerful than the original. I've encountered a few bumps as I've tested, but Huegel has been quick to post fixes.

You can download RadialMenu for yourself at radialmenu.weebly.com and either leave comments or questions in that site's forum or participate in the forum threads over at TabletPCReviews.

Although RadialMenu is free to download and install, I plan to contribute a few bucks to reward the developer for his efforts and encourage the utility's further development. I hope you will too.

Posted
AuthorRick Rodriguez
18 CommentsPost a comment

UPDATE: If you'd like to try the latest beta of Toolbar Creator 2.2, the developer has just released it publicly. http://forum.tabletpcreview.com/threads/toolbar-creator-v-2-1.63014/page-12#post-415712

Keyboard shortcuts are an absolute must for artists who are in the "zone." But sadly, docked keyboards and tablet pcs don't play well together in comfortable drawing positions. I strongly recommend that everyone who draws on a Windows tablet invests in a compact bluetooth keyboard, but even they can be poor substitutes for easy-to-reach Expresskeys or on-screen buttons.

The latter was possible on the Surface Pro 1 and 2 thanks to ArtDock: artist-customizable sets of on-screen shortcuts powered by a clever utility called AutoHotkey. Microsoft's switch to N-Trig with the Surface Pro 3 meant that handy utility was no longer compatible. And for a while, it looked like no one in the art community could figure out how to make Autohotkey scripts work with anything other than Wacom devices.

But in recent weeks, I've been experimenting with a handful of AHK-based solutions that show a lot of promise for users of any touch-capable tablet pc.

First up is Toolbar Creator by lblb, a teacher and researcher in organic chemistry at a liberal arts college who prefers to remain otherwise anonymous.

Rather than post his own ArtDock or toolbar, lblb set out to harness the power of Autohotkey and make it accessible to anyone. The screenshots below are from version 2.2 of the software, which is currently in beta.

While the number of options may seem overwhelming, Toolbar Creator is very logically designed and should be easy for any digital artist to understand, regardless of technical knowledge.

Despite claiming to be busy with his day job, the author is very active on the TabletPCReview forums where the software is maintained and he promptly responds to questions and suggestions from users.

When you first run the utility, you get a blank toolbar with number buttons. This is the first of two sample toolbar layouts. You can drag this toolbar around by pressing and holding the 1 button in the upper left corner. The only other functional i…

When you first run the utility, you get a blank toolbar with number buttons. This is the first of two sample toolbar layouts. You can drag this toolbar around by pressing and holding the 1 button in the upper left corner. The only other functional item is the 2 button, which loads up the program's main menu.

The main menu provides a taste of the wide range of system control that toolbars can provide. To begin creating your own toolbar or to customize the sample, tap on Toolbar Options.

The main menu provides a taste of the wide range of system control that toolbars can provide. To begin creating your own toolbar or to customize the sample, tap on Toolbar Options.

In the General settings window, you can create, clone, delete and rename toolbars. In this example, I'm creating a new toolbar called PhotoshopTest, which I've designated as my default.

In the General settings window, you can create, clone, delete and rename toolbars. In this example, I'm creating a new toolbar called PhotoshopTest, which I've designated as my default.

Tapping "Design a new toolbar" in the previous windows brings up the Toolbar design window. Here you drag and drop the buttons that will make up your toolbar. You can populate up to 20 columns by 20 rows. I recommend you start slowly (perhaps with o…

Tapping "Design a new toolbar" in the previous windows brings up the Toolbar design window. Here you drag and drop the buttons that will make up your toolbar. You can populate up to 20 columns by 20 rows. I recommend you start slowly (perhaps with only two columns by two rows) until you're familiar with the workflow. If you drop a button into the wrong slot, right clicking it will delete it. A lot of forethought is required for this step because once a grid is defined it can't be edited except by editing a large text file. lblb is working on a more flexible design for a future update. Clicking Save will allow you to name your new toolbar.

This is the layout I created and called Photoshop Test. It consists of four columns by nine rows. One of the advantages of Toolbar Creator is that you can label your buttons directly, so dressing them with bitmaps can come later (if at all). Since I…

This is the layout I created and called Photoshop Test. It consists of four columns by nine rows. One of the advantages of Toolbar Creator is that you can label your buttons directly, so dressing them with bitmaps can come later (if at all). Since I come from the Softimage mindset, I prefer a simple text button to a hard-to-decipher icon, but that's entirely up to you.

In the Active toolbar settings - 1 screen, you set the transparency of the toolbar (useful for Option 8 mentioned above) and the button height and width. The default size is 50 but to make the buttons impossible for fat fingers to miss, I've resized…

In the Active toolbar settings - 1 screen, you set the transparency of the toolbar (useful for Option 8 mentioned above) and the button height and width. The default size is 50 but to make the buttons impossible for fat fingers to miss, I've resized them to 100x100. Selecting the program ID (in this case Photoshop) ensures that button presses are always sent to the correct program, even when that program is not in focus.

Another very helpful feature of Toolbar Creator is seen on the Active toolbar settings - 2 window. Here you can determine the file format of your button images. The program defaults to .ico files which are great for scaling. But if you'd rather work…

Another very helpful feature of Toolbar Creator is seen on the Active toolbar settings - 2 window. Here you can determine the file format of your button images. The program defaults to .ico files which are great for scaling. But if you'd rather work in .jpg, .bmp or .png formats, those are supported as well. While designing your toolbar, I recommend selecting Type 2 activated icons, which don't require an additional set images. The solid bright blue is also easier to see as you're testing your work.  

The Toolbar Visibility window offers 13 options for your toolbar's on-screen appearance. In the couple of versions of ArtDock we previously published, the toolbar would disappear when the pen approached it. Option 2 is the closest to that setting, b…

The Toolbar Visibility window offers 13 options for your toolbar's on-screen appearance. In the couple of versions of ArtDock we previously published, the toolbar would disappear when the pen approached it. Option 2 is the closest to that setting, but I find that the toolbar will pop back into place too quickly after the pen stroke is registered. In Option 8, the toolbar is nearly transparent until the pen approaches it. To draw beneath the toolbar, I will either shrink it or move it out of the way with my free hand. One advantage that Toolbars have over ArtDocks is that the pen tip can be used as easily as the finger to tap buttons.

In the toolbar customization window, the toolbar you just designed shows up in the lower left. Selecting any button on the toolbar (highlighted in blue) brings up its properties on the right side of the window. In this example, I set the upper left …

In the toolbar customization window, the toolbar you just designed shows up in the lower left. Selecting any button on the toolbar (highlighted in blue) brings up its properties on the right side of the window. In this example, I set the upper left button to run the predefined Rollup Toolbar function, which collapses the large toolbar to a single button.

The Main menu window allows you to select the commands available when a button is assigned the Predefined action Show Menu (see below). Our colleague Alex Cheparev, who designed the icons in the SurfaceProArtist ArtDock, has also contributed some ic…

The Main menu window allows you to select the commands available when a button is assigned the Predefined action Show Menu (see below). Our colleague Alex Cheparev, who designed the icons in the SurfaceProArtist ArtDock, has also contributed some icons to Toolbar Creator. Alex is at work on his own set of toolbars which we hope to share with you soon.

Adding or subtracting items from the Menu list is a matter of moving items from one column of the Main menu window to the other.

Adding or subtracting items from the Menu list is a matter of moving items from one column of the Main menu window to the other.

When loaded, Toolbar Creator generates a system tray item. Those menus can be edited in the Tray menu and icon window.

When loaded, Toolbar Creator generates a system tray item. Those menus can be edited in the Tray menu and icon window.

The shortcuts available in the tray menu can be edited in the Shortcuts menu window seen below.

The shortcuts available in the tray menu can be edited in the Shortcuts menu window seen below.

Shortcuts menu

Shortcuts menu

Toolbar Creator even allows you to remap the Surface Pro 3's top pen button or redefine its double click action. The Surface Pro 3 remaps window also allows you to assign new actions to the Windows and Volume hardware buttons.

Toolbar Creator even allows you to remap the Surface Pro 3's top pen button or redefine its double click action. The Surface Pro 3 remaps window also allows you to assign new actions to the Windows and Volume hardware buttons.

lblb may want to remain somewhat anonymous, but his Herculean effort here deserves at least a little bit of Internet fame. Check out Toolbar Creator for yourself over at TabletPCReviews and stop back here to show us what you're able to create with his toolkit.

As soon as Alex Cheparev comes up with his Mudbox and ZBrush toolbars, we will post them here.

Next up, we'll be looking at a new utility that brings the Wacom radial menu to N-Trig pens. Stay tuned!

Posted
AuthorRick Rodriguez
CategoriesTips
15 CommentsPost a comment

Is Surface Hub more than a pretty face?

The long-awaited Surface Pro 3 pen pressure control panel app just went live in the Windows Store under the vague name Surface Hub.

I've only had a couple of minutes so far, but here are my first impressions. UPDATE: After 24 hours with the Hub, I've added a bit more information below.

The app is very pretty, clearly the product of the Microsoft marketing team. 

The app is very pretty, clearly the product of the Microsoft marketing team. 

When I first loaded the app, it couldn't find my pen although the pen was clearly working. The instructions in red are somewhat difficult to understand, so after a couple of failed attempts, I just restarted the Surface Pro 3 and the pen was recogni…

When I first loaded the app, it couldn't find my pen although the pen was clearly working. The instructions in red are somewhat difficult to understand, so after a couple of failed attempts, I just restarted the Surface Pro 3 and the pen was recognized.

Besides editing pen pressure, the app allows you to determine which version of OneNote (desktop or Modern) opens when the pen top button is pressed.

Besides editing pen pressure, the app allows you to determine which version of OneNote (desktop or Modern) opens when the pen top button is pressed.

Moving the pen pressure slider all the way to the right yields a uniform line. This will be helpful to users who complain that applications require too much pressure to register their strokes.

Moving the pen pressure slider all the way to the right yields a uniform line. This will be helpful to users who complain that applications require too much pressure to register their strokes.

I'm very disappointed by the lowest pressure sensitivity setting. The resulting curve is not nearly shallow enough. It would be great to have a multiple stroke pressure curve as seen in Manga Studio or Clip Studio Paint. Initial activation force (ti…

I'm very disappointed by the lowest pressure sensitivity setting. The resulting curve is not nearly shallow enough. It would be great to have a multiple stroke pressure curve as seen in Manga Studio or Clip Studio Paint. Initial activation force (tip sensitivity) is also not addressed.

A final screen allows users to give some feedback. Please stop by and let us know what message you're delivering to the Microsoft Surface team.

A final screen allows users to give some feedback. Please stop by and let us know what message you're delivering to the Microsoft Surface team.

UPDATE 10/12/14: The Pen Pressure Sensitivity slider offers seven settings: -1, 0, +1, +2, +3, +4 and +5. Selecting -1 as I illustrated above makes the pen somewhat unresponsive in many applications that already have spotty pen response, such as Google Chrome. Increasing sensitivity was very helpful in getting blacker blacks in Sketchbook Pro. Although it's not ideal, you may need to change the Hub pressure setting depending on the art application you're using. I've settled on +1 for the moment and I've changed my Manga Studio/Clip Studio Paint pressure curve (see below). 

Clip Studio Paint EX 1.3.8 pressure curve and resulting line variations with Frenden's Inker Brush. The Surface Hub setting is +1

Clip Studio Paint EX 1.3.8 pressure curve and resulting line variations with Frenden's Inker Brush. The Surface Hub setting is +1

Several of you have commented or tweeted that you're having difficulty getting the app to recognize your pen. Make sure you have the System Hardware Update - 10/6/14 installed. This is the firmware that enables the app to work. After installing the app, you may need to restart your Surface Pro 3. Anyone still having issues should leave a comment here and we will try to get Microsoft's attention.

ORIGINAL CONCLUSION

Overall, Surface Hub is a decent first effort, but I believe it needs a few more iterations before it will address all the concerns of the Surface Pro 3's creative community.

Posted
AuthorRick Rodriguez
CategoriesTips, news
17 CommentsPost a comment

The long-awaited Surface Pro 3 pen control panel should finally be available in a couple of weeks according to Surface Audience Marketing: Creators manager Markus Weickenmeier.

I had a chance to catch up with Markus during this week's Adobe Max and when he wasn't busy either shepherding executives to media briefings or helping new users set up their shiny new Surface Pro 3s, I pressed for an update regarding the much needed pen utility.

I was surprised to learn that the control panel will actually be a Windows Store app that will allow you to set the tip's initial activation force, edit the pen's pressure curve and map the cap button to either the desktop or Modern flavor of One Note.

The app should be available for download from the Windows Store in two weeks, but in anticipation of its release, users will first have to install a set of firmware or driver fixes coming during the next Patch Tuesday. UPDATE: That patch was actually released on Tuesday, October 7 as System Hardware Update 10/6/2014.

Unfortunately, remapping the pen's side switches won't be part of this release, but that function may be added to future app updates. As a store app, it will be easier to add future functionality, according to Weickenmeier.

I haven't been granted a look at the utility, so it remains to be seen whether it will satisfy my needs. In most software I use, I find that light strokes register too heavily, but users of Fresh Paint (for example) complain that they have to press too hard for their strokes to appear. It will be interesting to see if the IAF will have to be adjusted for different applications.

Another interesting question is whether the app will behave well with programs like Manga Studio which allow users to set their own pressure values.

The Manga Studio 5/Clip Studio Paint pen pressure preferences dialog box. It's unclear how the new Surface Pro 3 pen app will interact with these and other programs that allow users to adjust pressure curves.

The Manga Studio 5/Clip Studio Paint pen pressure preferences dialog box. It's unclear how the new Surface Pro 3 pen app will interact with these and other programs that allow users to adjust pressure curves.

Posted
AuthorRick Rodriguez
Categoriesnews, Tips
12 CommentsPost a comment

My excitement in discovering that Asus' VivoTab Note 8 pen driver contained a much higher resolution calibration tool quickly turned to panic when I discovered that the driver could render pens on other devices useless.

As I was testing the Asus VivoTab TF810C for the review I published yesterday, I installed the AVTN8 Wacom driver instead of the standard version. I was unaware at the time that that file contains a firmware update intended only for the 8-inch tablet. Installing the driver on either the TF810C or Dell's Latitude 10 changes the pen sensor, making it impossible to calibrate. And the change cannot be undone without another firmware update (not yet available).

Several of you have reported successfully running the AVTN8 driver on other hardware, including the Surface Pro 1 and 2, but I strongly advise you to resist that temptation. It's simply not worth the risk of ruining your hardware.

But what to do if the 25-point calibration found in Wacom's 7.2.0-10 Enhanced Tablet PC driver isn't enough?

Fortunately for you, I've been given a workaround that should work for all devices and is reversible in the event you don't like the results.

CAUTION: THIS FIX IS FOR TECHNICALLY ADVANCED USERS. PLEASE DON'T ATTEMPT IF YOU'RE NOT FAMILIAR WITH THE WINDOWS OPERATING SYSTEM. PROCEED AT YOUR OWN RISK!

Copy the attached code into a file named ISDTabletDefaults.xml. This is the grid layout for the AVTN8.

<?xml version="1.0" encoding="UTF-8"?>
<root>
<MultiCalRows>0,5,10,15,50,90,95,100</MultiCalRows>
<MultiCalCols>0,5,40,45,50,55,60,95,100</MultiCalCols>
</root>

It will cause issues if you don't reproduce this code exactly as seen above. You have been warned!

 Move the ISDTabletDefaults.xml file you just created into the C:\Windows\System32 folder.

Next, clear your Wacom preferences. Go to Control Panel\Programs\Programs and Features.

Select  Wacom Pen from the list of programs, then click on Change.

Click the Remove button under My Preferences.

Now, the next time you calibrate you should get the 81-points.

If for some reason you are dissatisfied with the results and would like to revert to 25-points, delete the ISDTabletDefaults.xml file from your System32 folder and clear your Wacom preferences again.

The next time you run the advanced edge calibration tool, it will have 25-points.

Posted
AuthorRick Rodriguez
CategoriesTips
8 CommentsPost a comment